How to Dual Boot Fedora and Windows 11

So, you run Windows and it does everything you need to do. But you’re done with relying on something so limited and corporate. But you aren’t ready to fully switch to Linux yet. There may be some application or game that you want to keep running. But the time is now to move your primary workflow to Linux. So, let’s dual boot the worst, with the best (in my opinion).
Please backup all important data before continuing!
We highly recommend doing this on two different drives instead of just one, however this guide still does cover it on one drive. If you are using one drive, not that Windows may not play well on Linux and has been known to do things like wiping Linux partitions during updates. Also before you do anything, we highly recommend backing up your data. Also below is a video guide that will go though everything step-by-step with additional detail.
Configuring Windows
Before starting this whole process, we are first going to want to turn off fast startup in Windows to prevent it loading in the Windows Kernel from your hard drive to increase boot save (it’s like a mix between a regular shutdown and Hibernation). This however can cause instability on a dual boot.

To turn it off, head over to Control Panel -> Hardware and Sound -> Power Options and than System Settings, and disable Fast Startup.

Partitioning Windows
With that, the next thing on the docket is to give Fedora a place to install. If you are dual booting with more than one drive, skip this section. Otherwise, to do this, first open the Disk management app in Windows, and you should see a screen that looks something like this:
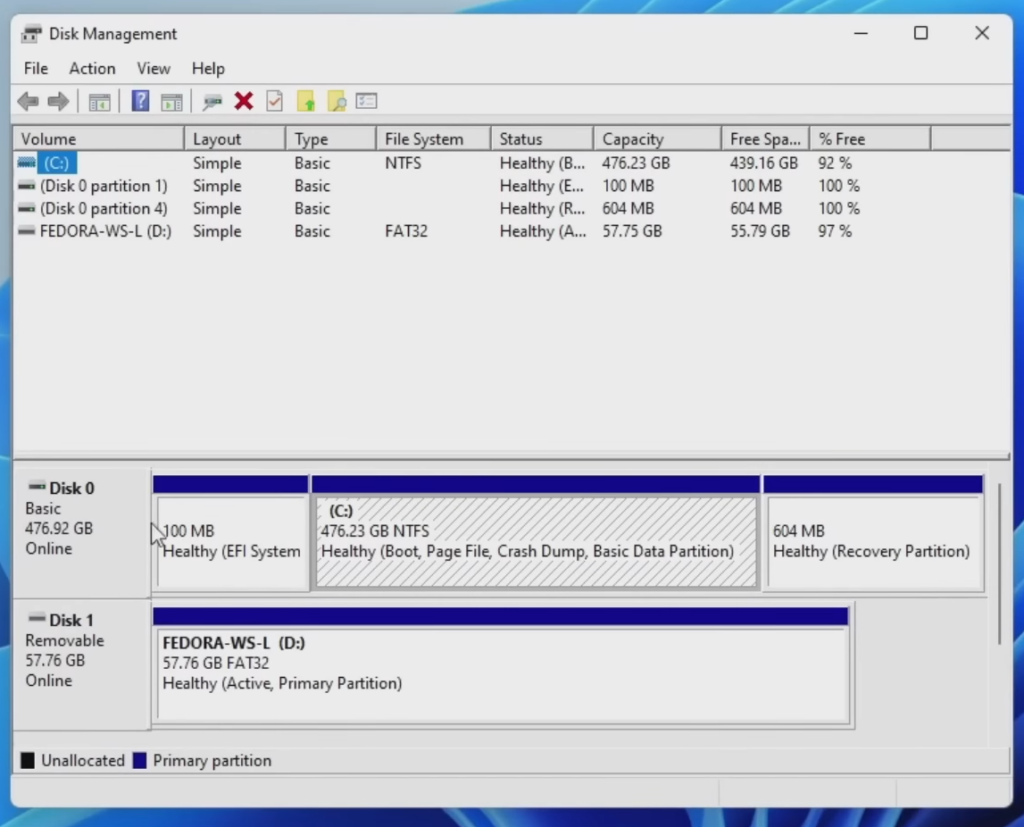
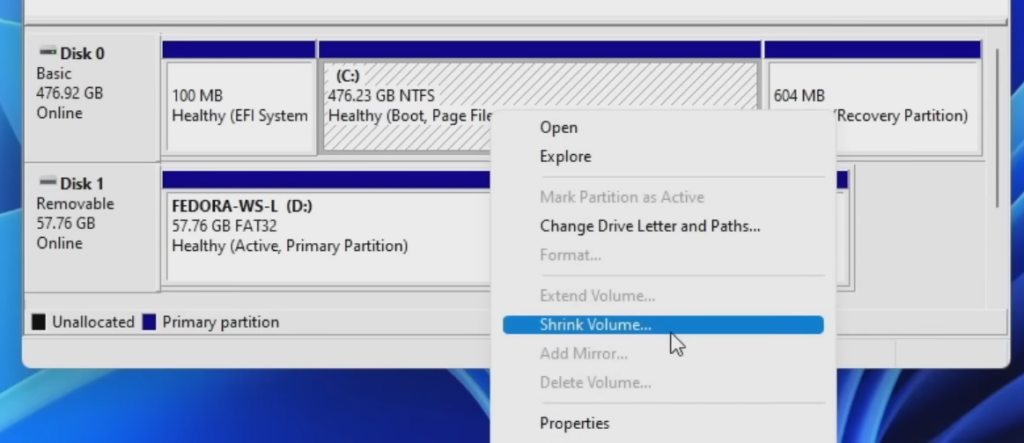
Next, we are going to figure out which drive we want to resize. It is most likely going to be Disk 0, but make sure to double check if you have multiple drives. Next up, we are going to right click the C drive (or whatever drive Windows is on) and we are going to shrink the partition to make room for a Linux partition. To do that right click you’re C: partition and go to shrink volume.
Now enter the amount of space you want to give Linux (in MB) into the “Enter the amount of space to shrink in MB”. Make sure to not shrink it to have less than what Windows is currently using, and make sure that Windows has atleast some free space left (maybe 30-40GB or so) to give Windows some leeway after the dual boot. Do note that 1000 MB is equal to 1 GB.
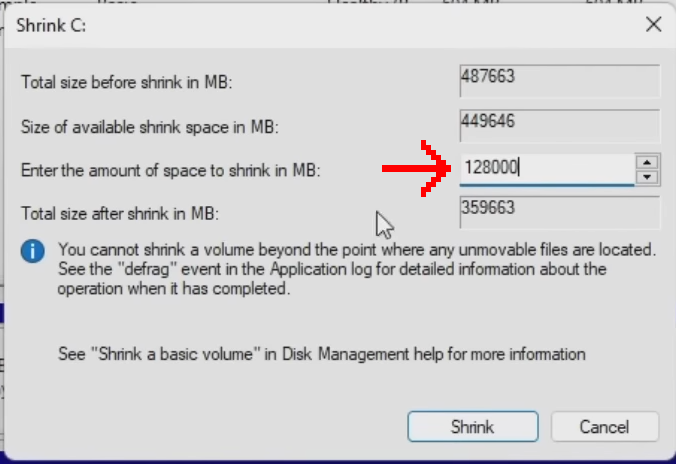
Now to apply the changes click on Shrink. But VERY IMPORTANT: BEFORE DOING ANYTHING TO YOUR DRIVES DO MAKE SURE TO BACKUP.
Creating a Fedora USB
Now we need to burn Fedora onto a USB. Make sure that you’re USB has atleast 4 GBs of space. My recommended tool for flashing Fedora is Rufus so make sure to download that, along with a Fedora ISO. Open up Rufus, select the USB you want to put Fedora on, select the Fedora ISO for boot selection, set partition scheme to MBR and target system to BIOS or UEFI. You can set Volume label to whatever you want, set File system to Large FAT32, and set the cluster size to 32 kilobytes.
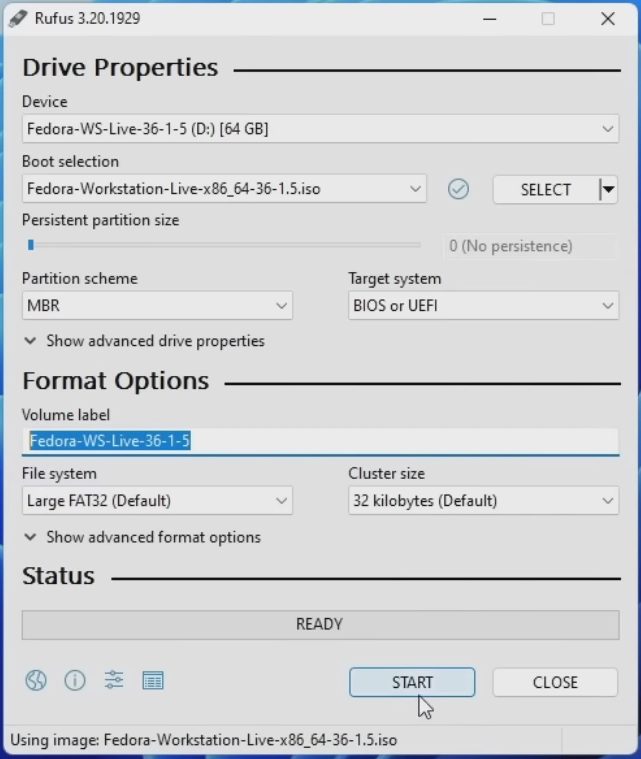
Before flashing Fedora onto the USB, DO NOTE THAT THIS WILL WIPE EVERYTHING ON THE USB. However, now click start (and select ISO mode if it asks). And we’re good to go once it flashes.
Jumping into the BIOS
Next thing we need to do is enter the bios settings. Doing this is a different process depending on who the OEM of your machine/motherboard is, but generally you will want to spam a certain key while booting (Usually a function key, or something like DELETE or INSERT). Every bios is different, so different options may be in different spots, but the things we need to change should be in somewhat similar spots. The first thing we need to do is disable Secure Boot. For me this is in the security tab, and you disable it by heading over to it and pressing enter.
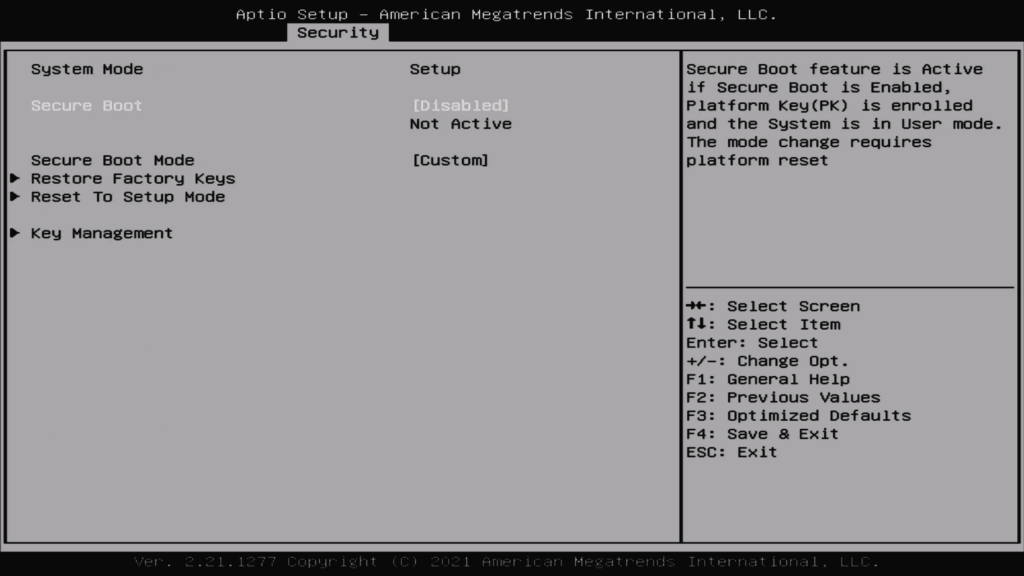
Do note that Secure Boot is a security feature and disabling it may leave your system vulnerable, and it is possible to install Fedora with Secure Boot. However, this process may not work out because it’s hardware dependent and there’s certificates involved. Also Secure Boot may prevent the system from booting if you run a custom kernel or mess with Grub.
Now head over to your boot options and change the boot order to prioritize the UEFI partition on your USB over the rest of your drives.
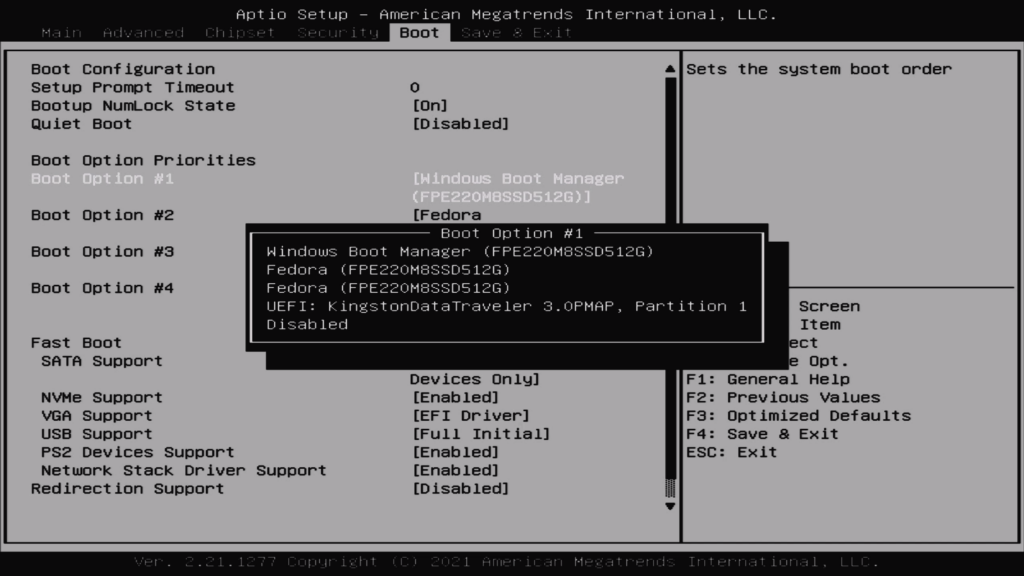
Finally, we can save and exit the bios settings.

After this your system should boot off the Fedora USB and we can continue with the installation.
Installing
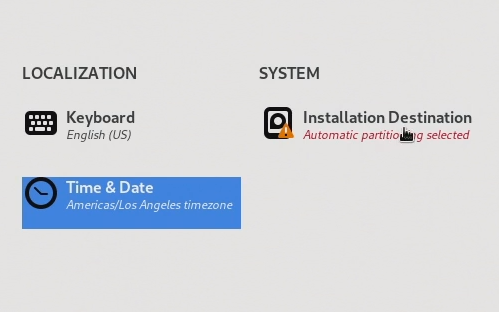
Once on the Fedora USB, boot the installer, and select “Installation Destination”
Next up select the disk you would like to install Linux onto, and then click done on the top right. This will automatically detect the free space on your disk and install Fedora into it. If you want to double check, you can set the storage configuration to “Custom” and when you click done, it will prompt for partitioning, in which case you can just click on “Click here to create them automatically”. Than you can see what changes Fedora is making to you’re drive.
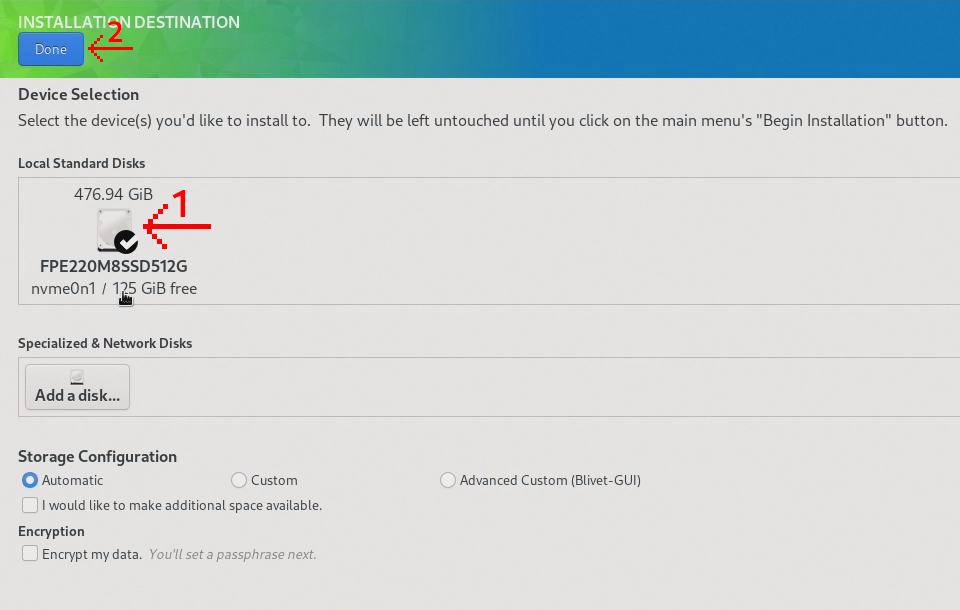
Also note if you are dual booting with 2 drives and you select a drive that is already filled with another OS partition, it may ask you to reclaim space. Other than that, from here, you can begin the installation and it will take 3-10 minutes roughly depending on your hardware. AGAIN, WE CANNOT STRESS THIS ENOUGH, BACKUP YOUR FILES BEFORE CONTINUING.
Now we have successfully installed Fedora alongside Windows on our system. However before enjoying the system, there is an extra optional but highly recommended extra step to increase system stability. We will be doing this within Fedora, so do not boot back into Windows again just yet.
Fixing Clock Issues
When you boot into Fedora for the first time, it will prompt you through a first time setup guide. Just go through all these steps real quick.
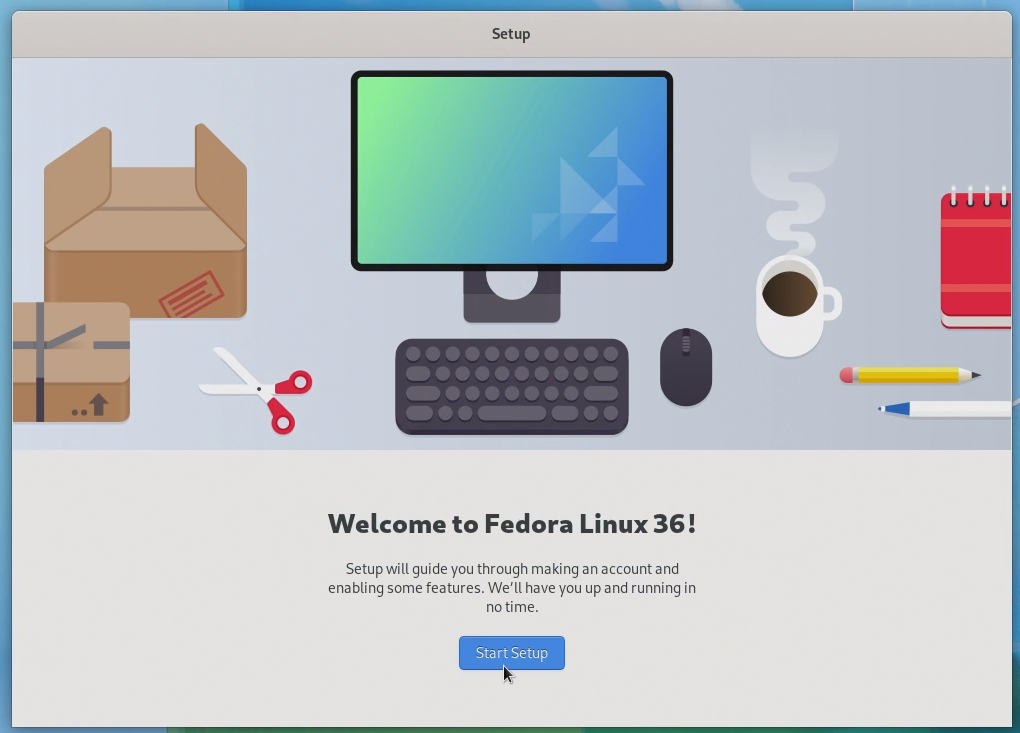
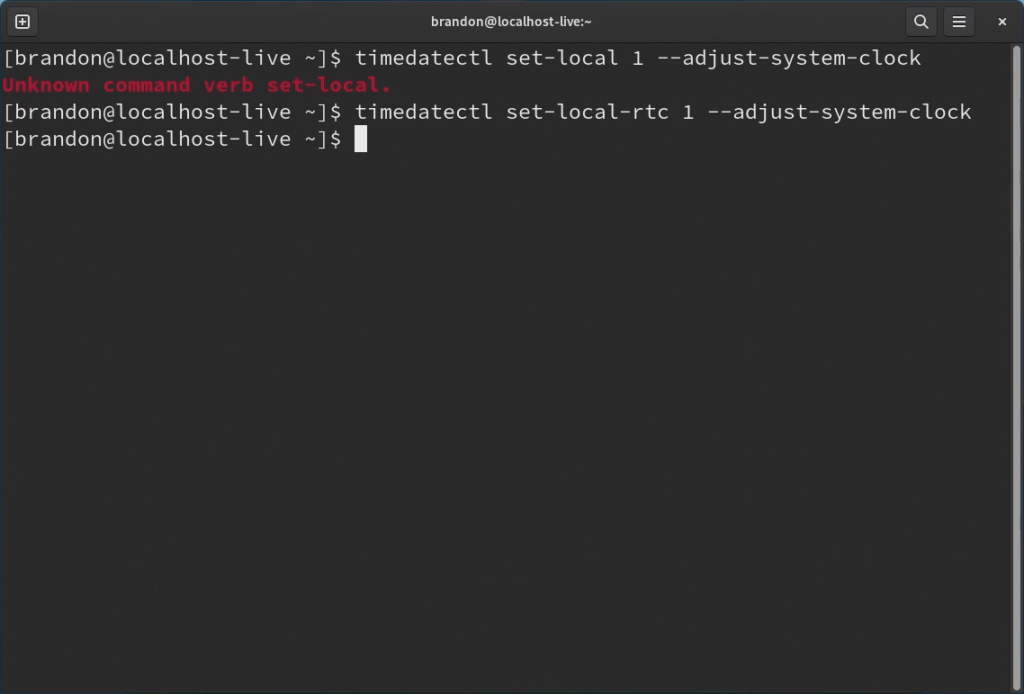
Once you run through the quick setup, open up a terminal and run the following command:
timedatectl set-local-rtc 1 --adjust-system-clock
What this does is set the real time clock to use “localtime” instead of UTC. The reason we need to do this is because out of the box Windows uses localtime for managing the system time and Linux uses UTC. So not changing this will result in the time becoming out of sync whenever you switch between the two operating systems.
Changing Windows to be primary
If you would like to make Windows the primary operating system instead of Fedora, we can do this with by installing Grub Customizer and modifying the grub config to allow Grub Customizer to edit Grub. You can do this with the following commands:
sudo sed -i 's/GRUB_ENABLE_BLSCFG=true/GRUB_ENABLE_BLSCFG=false/g' /etc/default/grub
sudo grub2-mkconfig -o /boot/efi/EFI/fedora/grub.cfg
sudo dnf install -y grub-customizer
The first command disables BLSCFG, the second command updates the grub configuration to apply the changes, and the third command installs Grub Customizer.
Now open up Grub Customizer and just select Windows Boot Manager and move it up to the top. (Note if the icon to move an entry up is missing, it is the 5th button on the toolbar from both the left and the right)
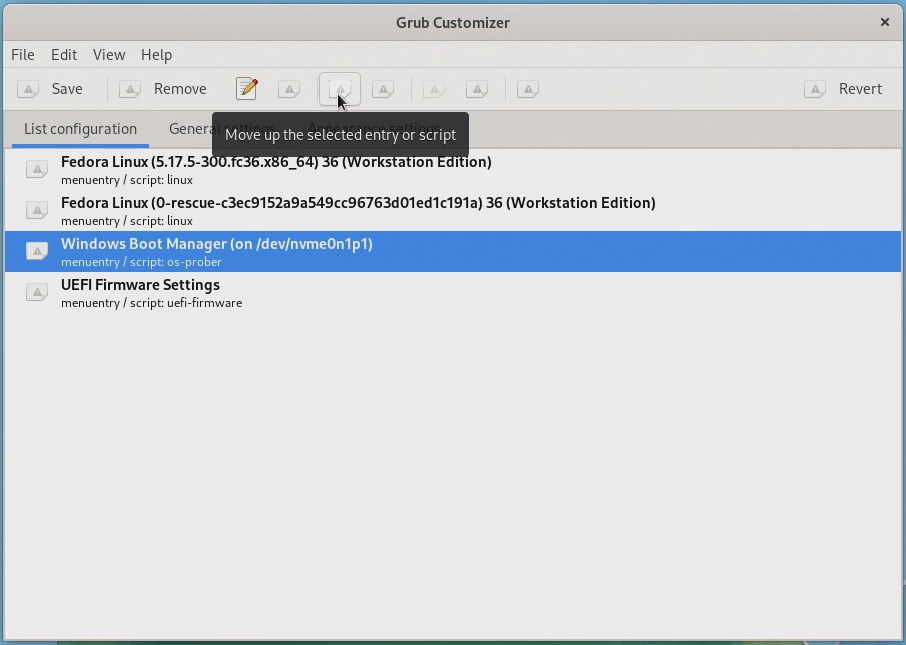
Grub Customizer also allows you to modify the appearance of grub under “Appearance settings”, and also allows you to change how long to keep the grub screen up and set kernel parameters under “General settings” if you would like to.
Testing Windows
Now, the last thing we are going to do is reboot and boot into Windows just to make sure that we didn’t destroy our Windows installation. If so than the dual boot has been successful and you can now enjoy your dual-boot system.

Comments ()