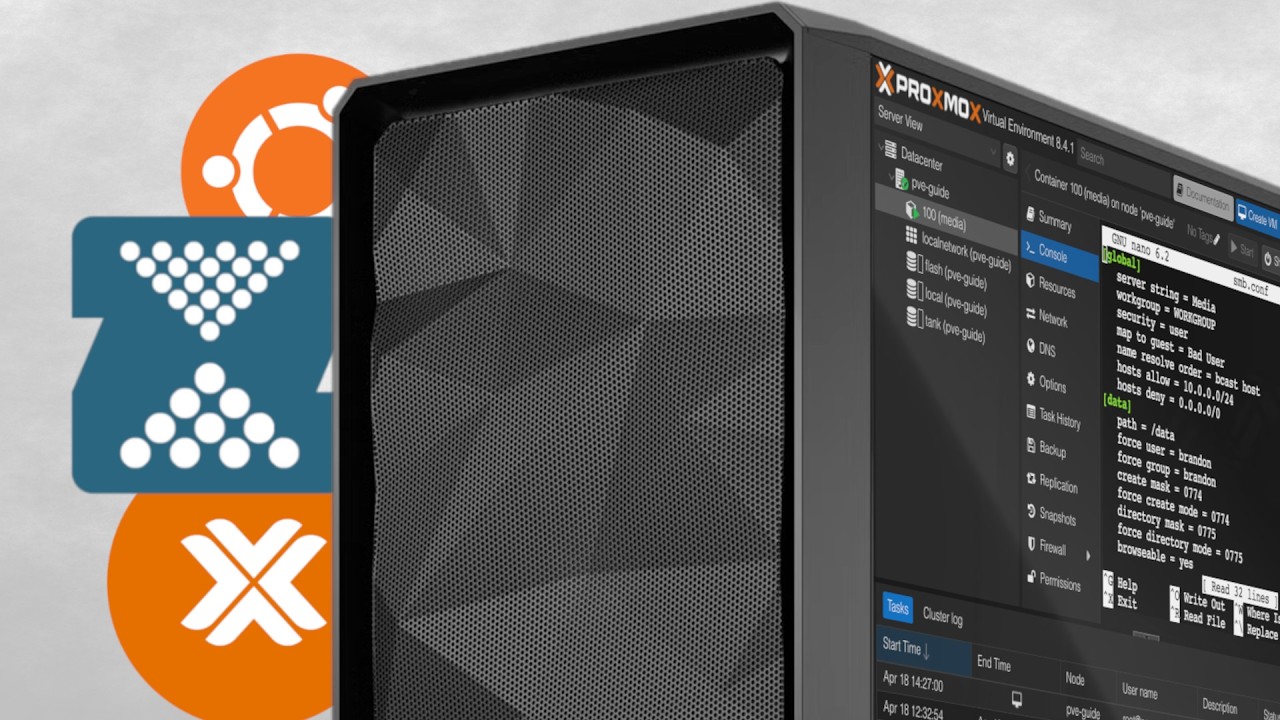


The Ultimate Home Server series
- Part 1: Proxmox, ZFS, and Samba shares
- Part 2: Jellyfin media server VM
- Part 3: The automated *arr stack
- Part 4: SSL certificates on everything
Late in 2024 I put out a Part 1 for my Proxmox home server build, and since then I've learned quite a bit, a lot of it from you all opening issues and sending commits to my homelab GitHub repo. So this is the remake: a fresh Part 1 with all of those fixes and improvements rolled in.
This part is the foundation everything else sits on. We install Proxmox VE, run through the post-install steps I always do, build two ZFS storage pools (a fast flash pool and a big tank pool), create our first container, give it storage, and share that storage with every computer on the home network using Samba. The later parts of the series build on exactly this layout, so it's worth getting right.
The video originally linked to the storage guide in my homelab repo. This article brings that walkthrough together with the video, including the repo's updates for Samba access, Windows discovery, Apple clients, and backups. I still keep the repo updated as people find better ways to do things. The steps below are for Proxmox VE 9.2, released May 21, 2026 (the video was recorded on the 8.x release line), and I've called out the places where the current procedure differs from what you'll see on screen.
The Layout We're Building
Before clicking anything, this is the end result. Later parts of the series link back to this table, so keep it handy.
| Piece | What it is | Used for |
|---|---|---|
Boot drive (local) | The small NVMe Proxmox is installed on | Proxmox and host configuration, plus ISO images and container templates |
flash | ZFS mirror of two 1 TB NVMe SSDs | Container and VM root disks, plus the /docker mount point |
tank | ZFS RAIDZ1 of six 4 TB hard drives | Bulk storage: media, image backups, archives. Holds the /data mount point |
CT 100 (media) | Unprivileged Ubuntu LXC | Owns /data and /docker, and runs Samba |
\\media\data | Samba share of /data | The share later parts mount, for example in the Part 2 Jellyfin VM |
\\media\docker | Samba share of /docker | Easy network access to small config files |
Pool names are up to you. I've seen a lot of people call their SSD pool nvme. I like flash and tank, and that's what the rest of this series uses.
If you're following the GitHub guide alongside this article, its container is called servarr instead of media. Both use CT 100, /data on tank, and /docker on flash. The repo's 6 cores, 8 GB of RAM, roughly 28 TB data mount, and 128 GiB Docker mount describe my larger setup. The smaller allocations below follow the video; size them for your own pools rather than copying the repo's numbers.
Pick Your Hardware
You can install Proxmox on just about anything: a mini PC, a NAS box that lets you run a third-party OS, or an old desktop you're repurposing. There are a ton of variables, but here's what I generally recommend:
- CPU: at least four cores, more depending on how many services you plan to run. On AMD, I'd say Ryzen 3000 series or newer as a bare minimum. On Intel, get something with Quick Sync so you can do hardware transcoding for media later on. That comes in really handy.
- GPU: if you're on an AMD desktop without integrated graphics, throw in an NVIDIA card that supports hardware transcoding.
- Boot drive: an NVMe SSD. If you can't add more NVMe drives to your system later, go bigger, 512 GB to 1 TB or more if your budget allows, since your VMs and containers will live on it too.
- Bulk storage: affordable 4 TB hard drives work great. Get at least two so you can mirror them. If one fails, you swap it out and don't lose anything.
- RAM: ZFS likes memory. The Proxmox ZFS documentation says you need at least 8 GB to start, and its rule of thumb for the ZFS cache is 2 GiB plus 1 GiB per TiB of storage.
For this video I'm using a ZimaCube with six 4 TB hard drives and three NVMe drives: a small one to boot Proxmox, and two 1 TB WD Blue drives mirrored for container and VM storage. An old desktop is honestly the most flexible option, though, since PCIe cards can add more SATA ports or NVMe slots.

ZFS needs direct access to the disks. Do not put ZFS on top of a hardware RAID controller. If you need more ports, use a plain HBA (for example an LSI card flashed to IT mode), as the Proxmox ZFS docs recommend.
Install Proxmox VE
Download the current ISO from the Proxmox VE downloads page and write it to a USB drive:
- Windows: Rufus works, but the Proxmox install docs say to choose DD mode and to click No when it offers to download a different version of GRUB. balenaEtcher also works out of the box.
- macOS: balenaEtcher.
- Linux: I use GNOME Disks. Select the USB drive and use Restore Disk Image with the ISO.
ddworks too.
Plug the USB into your server and boot from it. In the firmware settings, make sure virtualization (Intel VT-x or AMD-V) and the IOMMU option (often called VT-d or AMD-Vi) are enabled, since Proxmox is a virtualization platform first. In the video I mentioned you might need to disable Secure Boot. That's only true for installers older than 8.1. Proxmox VE has supported Secure Boot out of the box since 8.1, so you can leave it on.
Then walk through the installer:
- Choose Install Proxmox VE (Graphical) and accept the license agreement.
- Target hard disk: pick the correct drive. I chose the smallest one (238 GB), my boot NVMe. I hadn't installed the other NVMe drives yet, so it was the only option. If you have several drives connected, double-check the selection, because the installer wipes it. Keep the default ext4 filesystem if you want to follow the optional
local-lvmstep below. - Location and time zone.
- Password and email: use a strong root password. The email address is where Proxmox sends notifications, so use one you read.
- Network: plug in Ethernet before you start the installer so it can detect the active interface. It's marked with a green dot.
- Hostname: this is how the machine appears on your network and on the login screen. The default is
pve.lan. I usedpve-guide.localfor the video (PVE stands for Proxmox Virtual Environment). Set a static IP here if you want a specific one, and the gateway and DNS server can usually stay as detected. - Review the summary and click Install. The system reboots when it finishes.
After the reboot, the console shows the web interface address. Mine was https://10.0.0.32:8006. Open that from another computer, accept the self-signed certificate warning, and log in as root with the password you set during installation.
The node in the sidebar (pve-guide for me) is the machine you just installed. Clicking it shows the summary, the Shell (we'll use that a lot), and everything else.
Post-Install Steps
Switch to the No-Subscription Repository
Proxmox enables the enterprise repositories by default, and those require a paid subscription. Without one, updates fail. The fix:
- Select your node and go to Updates > Repositories.
- Select the
pve-enterpriseentry and click Disable. On Proxmox VE 9 there's also a Ceph enterprise entry, so disable that one too. - Click Add, acknowledge the subscription notice, choose No-Subscription, and click Add.
- Go to Updates, click Refresh (that's an
apt update), then Upgrade.

When the upgrade finishes, you should see a message that your system is up to date. If you prefer the shell, Proxmox's system update docs say to use full-upgrade, never plain apt upgrade:
apt update
apt full-upgrade
The Proxmox package repository docs describe no-subscription as suitable for testing and non-production use, and say its packages aren't validated as heavily as enterprise packages. For a home server, that's the usual trade-off.
My repo also mentions the community Proxmox VE Post Install script as a shortcut. I read the current script, and it asks before each change. Besides switching repositories and upgrading, it can also patch the web UI to hide the subscription nag, add a disabled test repository, and turn off the high-availability and Corosync services. That's more than the manual steps do, so read each prompt. Leave high availability alone if you plan to cluster later.
Optional: Delete local-lvm and Grow local
This one is completely optional, and only for a fresh install with the default ext4 layout. By default the boot drive is split into local (a directory for ISOs, templates, and backups) and local-lvm (a thin pool for VM and container disks). On my 256 GB drive, local had only 72 GB free while local-lvm had 151 GB.
The simplest option is to leave it alone; creating separate ZFS pools doesn't require deleting local-lvm. If you're still in the installer and already know you won't use it, the advanced LVM options let you set maxvz to 0 to avoid creating the data volume. That doesn't automatically give all the space to local; maxroot controls the root volume's size. The commands below are the alternative for an existing fresh installation.
I don't put any guest disks on the boot drive because the flash pool handles that, so local-lvm would sit unused. If you only have one SSD, skip this and keep local-lvm, since that's where your containers and VMs would go. There's also a discussion in my repo about installs that used advanced storage options, where these commands don't apply.
These commands destroy the local-lvm thin pool and everything on it. Only run them on a fresh install, before you've created any guests there.
First remove the storage entry under Datacenter > Storage > local-lvm > Remove. That only removes the configuration. To reclaim the space, open your node's Shell and run:
lvremove /dev/pve/data
lvresize -l +100%FREE /dev/pve/root
resize2fs /dev/mapper/pve-root
The first command deletes the logical volume behind local-lvm, the second gives all the free space to the root volume, and the third grows the ext4 filesystem to match. After that, local shows the full drive. I use it for ISO images and container templates.
IOMMU for PCI Passthrough
You can skip this section for the storage and Samba setup. It's only relevant when you want to pass PCI devices through to a VM.
IOMMU is what lets you pass hard drives, graphics cards, and other PCI devices through to VMs. In the video I edited /etc/default/grub to add intel_iommu=on and ran update-grub. That's no longer necessary on current releases. According to the Proxmox admin guide, IOMMU is enabled by default with AMD CPUs, and on Intel it's on by default with kernel 6.8 or newer. Proxmox VE 9.2 ships kernel 7.0.
So now all you need to do is enable IOMMU or VT-d in your firmware and verify it after booting. These are the checks from the PCI passthrough wiki:
dmesg | grep -e DMAR -e IOMMU
dmesg | grep 'remapping'
You want something like DMAR: IOMMU enabled from the first command, and AMD-Vi: Interrupt remapping enabled or DMAR-IR: Enabled IRQ remapping in x2apic mode from the second. If the first command prints nothing, check your firmware settings before touching the kernel command line.
You only need intel_iommu=on on an Intel system with an older kernel. With GRUB, add it to GRUB_CMDLINE_LINUX_DEFAULT in /etc/default/grub and run update-grub. With systemd-boot, add it to /etc/kernel/cmdline and run proxmox-boot-tool refresh. Skip amd_iommu=on. on isn't one of the values the kernel accepts for that parameter. The PCI passthrough wiki goes much deeper on GPUs and driver blacklisting.
Create the ZFS Pools
Now it's my favorite time of the day: making storage.
Wipe the Disks
Go to your node, then Disks. Any drive that has old data on it needs to be wiped. Select it and click Wipe Disk. This erases everything on that drive, so back up anything you care about first.
Don't wipe the boot drive. It's the one with the BIOS boot and EFI partitions. I wiped my two NVMe drives and all six 4 TB drives, and each one only takes a second.
The Flash Pool (Mirror)
Go to Disks > ZFS > Create: ZFS:
- Name:
flash - Add Storage: keep this checked. It makes the pool available to Proxmox immediately, and container volumes become ZFS datasets instead of
.rawimage files. Adding directories was how my older setup worked, and this is better. - Devices: the two 1 TB NVMe drives
- RAID Level:
Mirror - Compression and ashift: I leave these at the defaults (compression
on, ashift12)
Click Create, and flash shows up online.

The Tank Pool (RAIDZ)
Run Create: ZFS again:
- Name:
tank - Devices: all six 4 TB WD Red drives
- RAID Level:
RAIDZ - Add Storage: checked
RAIDZ (RAIDZ1) is roughly the ZFS equivalent of RAID 5. This six-disk vdev tolerates one failed disk; it stays degraded until the replacement finishes resilvering. A second failed disk in that vdev loses the pool. RAIDZ2 tolerates any two failures in the vdev and RAIDZ3 tolerates three, at the cost of more capacity. A two-disk mirror tolerates one failure in that pair; multiple mirrored pairs can survive more failures only if no pair loses both disks. These are the OpenZFS redundancy rules, and they're worth understanding before picking a layout. RAID still isn't a backup.

Finally, check Datacenter > Storage and confirm both flash and tank have the Disk image, Container content types.
Why the Free Space Looks Wrong
After creating tank, the size in the GUI looked too big, and that's normal. The GUI is showing you zpool list, which reports raw pool capacity including parity. zfs list shows what you can write:
zpool list
zfs list
On my six-drive RAIDZ pool, zpool list showed about 22 TB, and zfs list showed about 17 TB available. That's because the OpenZFS pool properties count raw physical space, while dataset space accounts for raidz parity and reserved space. Plan around the zfs list number.
Check Pool Health
Before adding data, run this in the Proxmox host shell:
zpool status -v flash
zpool status -v tank
Both pools and their member disks should be ONLINE, with no reported data errors. zpool status also shows resilver and scrub progress. Keep periodic scrubs and working failure notifications in your maintenance plan: scrubs check stored data and can repair damaged blocks when a good redundant copy is available.
Create the Media Container
This first container is my main media server box. It holds most of the data on the server, and on my own machine it runs all the *arr apps, plus things like music and ebooks. You can organize this however you want, but this is how I do it.
Download a Template
Click your local storage, then CT Templates > Templates, search for Ubuntu, and download it. Use whatever distro you're most comfortable with. If you've never used one before, Ubuntu is a good place to start.
In the video I picked Ubuntu 22.04 because it seemed better supported on Proxmox at the time. Today I'd pick Ubuntu 24.04 LTS, which the repo now recommends too. Standard support for 22.04 ends in May 2027. The Proxmox template list also includes 26.04. The only command that changes between 22.04 and 24.04 below is the Windows discovery package, and I'll point that out when we get there.
Container Settings
Click Create CT in the top right. What I used:
| Tab | Setting | Value |
|---|---|---|
| General | CT ID | 100 |
| General | Hostname | media |
| General | Unprivileged container | Checked (better for security) |
| General | Nesting | Leave at the Ubuntu template's default |
| General | Password | A strong root password |
| Template | Template | The Ubuntu template you downloaded |
| Disks | Storage / size | flash, 64 GiB |
| CPU | Cores | 4 |
| Memory | Memory / swap | 4096 MiB / about 1024 MiB |
| Network | IPv4 | Static, 10.0.0.100/24, gateway 10.0.0.1 |
| DNS | Leave as is |
A few notes on those choices:
- CT ID and IP: I like matching the container ID to the end of its IP address. In the video I used
10.0.0.33because.100was already taken on my network, but these steps use10.0.0.100to follow that habit. Use your own subnet and gateway, or choose DHCP if your router manages addresses. If you leave the network tab untouched, the container won't get an address. - Hostname:
mediakeeps things simple. On my real server, and in my repo, it'sservarr. - 64 GiB root disk: media files don't go here, but app data does, and a Jellyfin or Plex config folder gets big with cover art on a large library. You can expand it later.
- CPU and RAM: size these for what you'll run. My repo lists 6 cores and 8 GB for my own server.
Keep this container unprivileged. Nesting also affects systemd service isolation, so don't change it just because the storage folder is called /docker. That name doesn't install Docker. If you later run Docker inside LXC, Proxmox documents additional feature requirements, including keyctl; for stronger isolation, use a VM for those workloads.
Click Finish. Under the container's Resources tab, you'll see the root disk on flash as subvol-100-disk-0 at 64 GB.
Add the Data and Docker Mount Points
Now for the bulk storage. On the container, go to Resources > Add > Mount Point:
Mount point 0 (data):
- Storage:
tank - Disk size (GiB): as much as you want for media. I used
8000in the video, and my repo uses about 28 TB on my larger pool. - Path:
/data - Backup: checked, unless you've arranged and tested a separate file backup
I like mounting this at /data in the root of the filesystem. It makes Docker setups and my own organization much simpler, and the rest of the series uses that path.
Mount point 1 (docker):
- Storage:
flash, since these are small config files that I want on fast storage - Disk size (GiB):
32was plenty for the video, and my repo now uses 128 - Path:
/docker - Backup: checked
Alternative to the GUI: if you haven't added either mount point yet, these commands create them from the Proxmox host shell. Don't run them after creating the same mounts in the GUI. Sizes are in GiB:
pct set 100 --mp0 tank:8000,mp=/data,backup=1
pct set 100 --mp1 flash:32,mp=/docker,backup=1
pct config 100
These are storage-backed mount points, so each one becomes a ZFS dataset on its pool with a size limit that you can grow later. Unlike the GUI, pct set leaves mount points out of backups unless you add backup=1, which is why it's on both lines.
Whichever method you use, run pct config 100 on the host and confirm that mp0 and mp1 have the intended paths and backup=1. Under the container's Options, set Start at boot to Yes so the shares return after a host reboot. The container configuration reference documents this as onboot, which defaults to off.

In the video I unchecked Backup on both mount points and said I'd cover backups in a future video. Only do that if the data is covered by a separate, tested backup. Unchecked mount points are left out of container backups entirely. My Proxmox Backup Server guide covers backing up containers, and the backup section of my storage README covers what needs a file-level backup.
First Boot: Updates, a User, and Permissions
Start the container, open its Console, and log in as root with the container password. First things first:
apt update && apt upgrade -y
apt install sudo
ls /
You should see data and docker in the root listing.
Doing everything as root isn't a great idea, so create a regular user. I'm using brandon. Replace youruser with your own name everywhere below:
adduser youruser
adduser youruser sudo
su - youruser
Creating the user also creates a group with the same name. Right now, if you cd /data and try touch test.txt, you'll get permission denied, because root owns the mount points. Make your user the owner of both:
sudo chown youruser:youruser /data /docker
sudo chmod 0770 /data /docker
touch /data/test.txt && ls /data
Do this inside the container, on the fresh mount points. There's no need to change ownership recursively on empty volumes, and doing so later could overwrite ownership that applications need. The directory mode gives your user and group access while excluding other local users.
Share It with Samba
In my 2024 series I used Cockpit's web interface for the network shares. That still works if you'd rather click through it, but I've found it easier to just configure Samba directly in the container. It's more terminal work, but you end up with one small config file that you understand.
Install and Back Up the Default Config
sudo apt install samba
sudo cp -an /etc/samba/smb.conf /etc/samba/smb.conf.original
Keep that original file. It's full of comments and printer examples that are worth checking later, and it's your rollback if something goes wrong.
Write the Config
sudo nano /etc/samba/smb.conf
Replace the file contents with this, changing youruser to your username and 10.0.0.0/24 to your client network. This is a shorter, single-user version of the video/repo config:
[global]
   server string = Media
   workgroup = WORKGROUP
   security = user
   hosts allow = 127.0.0.1 10.0.0.0/24
   hosts deny = ALL
   create mask = 0660
   directory mask = 0770

[data]
   path = /data
   valid users = youruser
   read only = no

[docker]
   path = /docker
   valid users = youruser
   read only = no
What that does:
valid users: only this account can access each share. Writes use the authenticated user's identity, soforce userandforce grouparen't needed here.hosts allow/hosts deny: permit loopback and the example IPv4 LAN, deny other addresses. Add other trusted subnets or IPv6 ranges explicitly if you use them.- The masks: shared defaults cap new files at
0660and directories at0770. Unlike the repo'sforce create mode = 0774, this doesn't force execute bits onto ordinary files. - Defaults: shares are browseable and guest access is disabled by default.
read only = noenables writes;writable = yesmeans the same thing, so we only need one.
These options are documented in the Samba configuration reference. This example deliberately gives the same account access to both shares. The docker share can contain application secrets, so don't give its credentials to someone who should only access media.
Set a Samba Password and Start the Services
Samba keeps its own password database, so give your user a Samba password. This is the password other computers use to connect:
sudo smbpasswd -a youruser
Then make sure the services start on boot and restart them to load the new config:
sudo systemctl enable smbd nmbd
testparm
sudo systemctl restart smbd nmbd
testparm checks the config for syntax mistakes. Fix any errors before restarting the services.
macOS Compatibility (Optional)
The video doesn't show this, but my repo now includes it for Mac and iOS users. Samba's vfs_fruit module adds Apple's SMB extensions for Finder metadata and resource forks. Add these lines to the [global] section, then restart smbd:
   vfs objects = catia fruit streams_xattr
   fruit:metadata = stream
   fruit:model = MacSamba
   fruit:nfs_aces = no
   fruit:zero_file_id = yes
Run testparm again, then sudo systemctl restart smbd to load the changes. These settings improve Apple client compatibility; they don't configure a Time Machine backup destination.
Connect from Your Computers
macOS
I tested from my Mac first. In Finder, under Network, media showed up right away. Opening it as a guest and clicking data threw an error, which is exactly what should happen with the config above. After reconnecting as my user (Connect As, then Registered User), data opened and the test.txt file from earlier was there. I edited it on the Mac, saved it, and ran cat on it in the container, and the new text was there.
You can also connect directly with Go > Connect to Server (Cmd+K) and smb://10.0.0.100/data.
iPhone and iPad
The storage README also covers connecting from the Files app. While connected to your home network, open Files > Browse, tap the three-dot menu, and choose Connect to Server. Enter smb://10.0.0.100, choose Registered User, and sign in with the username and password you set with smbpasswd. Open data or docker from the server's share list. Use your container's IP if it differs from this example, and apply the Apple compatibility settings above if needed.
Windows: Connect Directly First
Start with \\10.0.0.100\data in File Explorer and sign in with your Samba credentials. For a persistent drive letter, use This PC > Map network drive, enter that path, and check Connect using different credentials. This works without a discovery service and is the simplest way to use the share.
Optional: Windows Network Discovery with wsdd
Windows is where discovery gets annoying. I booted a Windows VM, and under Network in File Explorer the only share it could see was my other server, not media. wsdd advertises the server using Web Services Discovery so it appears there. It doesn't enable SMB access or resolve hostnames; the direct IP connection above works independently of it. You don't need to enable SMB1.
On Ubuntu 22.04, as in the video, installing it was a single command, and media showed up in Windows almost immediately:
sudo apt install wsdd
On Ubuntu 24.04 and newer, the systemd service moved to a separate package called wsdd-server, so install that instead:
sudo apt install wsdd-server
sudo systemctl enable --now wsdd-server
If double-clicking the discovered server fails, try \\10.0.0.100\data directly and enter your Samba credentials. \\media also works if your network can resolve that hostname. Discovery and hostname resolution are separate, so use the IP address to narrow down the problem.

I edited the same text file from Windows, then copied a big file over at plain gigabit speed. I really need to upgrade my network stack eventually.
Linux
On a Linux desktop or VM, mount the share with cifs-utils. This is exactly how the Part 2 VM gets at /data, so I'll cover the permanent fstab setup there instead of repeating it here. A quick test looks like this:
sudo apt install cifs-utils
sudo mkdir -p /mnt/data
sudo mount -t cifs //10.0.0.100/data /mnt/data -o username=youruser
Troubleshooting Samba
The storage README's troubleshooting section is useful here: first separate a connection problem from a discovery problem. From Windows PowerShell, check whether the container is reachable on SMB's port:
Test-NetConnection -ComputerName 10.0.0.100 -Port 445
If that fails, check the container's IP, network path, and firewall. If it succeeds, try opening \\10.0.0.100\data directly in File Explorer. A working direct connection means you can use the share even when the server is missing from Network. Discovery normally stays within the local subnet; clients on another subnet may need the direct address even when routing allows SMB traffic.
I didn't need any firewall changes. If you've already enabled ufw in the container, allow SMB from your client subnet. Use your own network in place of 10.0.0.0/24:
sudo ufw allow from 10.0.0.0/24 to any port 445 proto tcp
Only if you enabled wsdd, also allow its discovery ports, UDP 3702 and TCP 5357, from that subnet:
sudo ufw allow from 10.0.0.0/24 to any port 3702 proto udp
sudo ufw allow from 10.0.0.0/24 to any port 5357 proto tcp
These rules are for the container's firewall. If you've enabled Proxmox or network firewalls too, permit the same traffic there. Don't enable a new firewall as a troubleshooting shortcut; first allow any management access you rely on.
If Windows says the network name isn't available, check that your client's IP is covered by hosts allow. A 192.168.x.x client hitting a config that only allows 10.0.0.0/24 gets refused.
Run these checks inside the container, where Samba is installed:
grep 'hosts allow' /etc/samba/smb.conf
sudo ufw status
sudo systemctl status smbd
testparm
For an access denied or bad password error, check Samba's user database and reset the password for the Linux user you created earlier:
sudo pdbedit -L
sudo smbpasswd -a youruser
Use those credentials on the client. If login succeeds but writing fails, check ownership with ls -ld /data /docker and make sure the authenticated user owns and can write to those directories. If direct access works but Windows discovery doesn't, check sudo systemctl status wsdd-server on Ubuntu 24.04, or sudo systemctl status wsdd on the 22.04 setup shown in the video.
And keep these shares on your LAN. Don't port forward SMB to the internet. If you need remote access, use a VPN. My NetBird guide is one way to do it.
Back Up the Storage Before Filling It
The repo's backup section goes further than the original video. Creating the pools and shares doesn't create a backup, and a snapshot on tank won't help if you lose that pool.
For this layout, check these items before putting anything irreplaceable on the server:
- Container and mount points: schedule backups of CT
100, and confirm/dataand/dockerare included. Thebackup=1commands above include these storage-backed volumes. If you exclude the large/datavolume, give it a separate file backup. Proxmox excludes bind and device mount contents from container backups, so check the actual mount type if you adapt this layout. - Configuration and recovery access: preserve the Proxmox host configuration, container settings, Samba config, and the passwords or encryption keys needed to restore. Keep recovery information somewhere you can reach with this server offline.
- Application data: once later parts add services, use each application's supported backup procedure. A database and its files need a consistent recovery point; copying a live database directory through the
dockershare isn't enough. - Copies and schedule: start with daily backups to a separate machine or disk, plus an encrypted offsite copy. Take another backup before upgrades or storage changes. The repo suggests 14 daily, 8 weekly, and 6 monthly recovery points as a starting policy, adjusted for capacity. Configure failure notifications and test that they reach you.
- Restore test: restore to a separate test container or directory before relying on the backup. Open restored files, check ownership, and test Samba access. Repeat after major changes and periodically; the repo suggests quarterly. Record which backup you used and how long recovery took.
Those are steps to configure and verify, not things the storage setup has already done. My Proxmox Backup Server guide walks through guest backups; keep a separate plan for anything you leave out of those jobs.
Final Thoughts
Proxmox handles the hardware, ZFS handles the disks, and one plain Ubuntu container owns the data and shares it with everything else. A lot of the improvements over my older version came from people filing issues and sending commits to the repo, like checking Add Storage on the pools instead of adding directories. The guide is much better for it.
Pick your RAID level based on your drives and how much risk you're comfortable with, and plan a real backup before you fill tank with things you can't replace. Parity protects you from a dead disk, not from deleting the wrong folder. My Proxmox Backup Server guide is a good next step for that.
If you find a better way to do any of this, open an issue on the homelab repo. I'll test it and update the docs.
Next Up
With the pools built and the data share online, Part 2: Jellyfin media server VM creates a VM, mounts this data share inside it, and sets up Jellyfin on top. With all that, I do hope you have an absolutely beautiful day.