

The Ultimate Home Server series
- Part 1: Proxmox, ZFS, and Samba shares
- Part 2: Jellyfin media server VM
- Part 3: The automated *arr stack
- Part 4: SSL certificates on everything
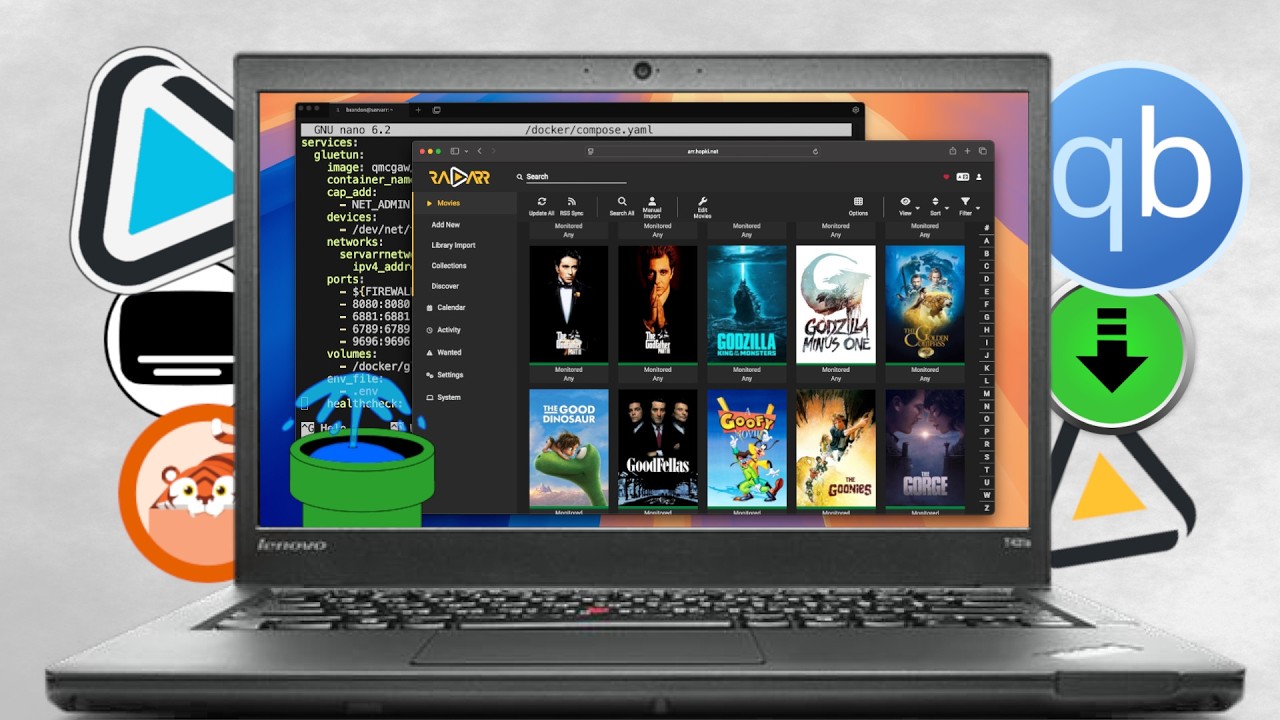
In this part I'm putting the automation on the server. It's one Docker Compose stack with a VPN container (Gluetun), two download clients (qBittorrent and NZBGet), an indexer manager (Prowlarr), the library managers (Sonarr for shows, Radarr for movies, Lidarr for music), Bazarr for subtitles, and Seerr for requests. Everything lands in the same /data folder that Jellyfin already reads from, so a finished download shows up in your library without you copying or renaming anything.
Quick disclaimer, same as in the video: I'm not encouraging anybody to download copyrighted content. Check your local laws. Everything I demonstrate uses freely licensed or public domain material, like an Ubuntu ISO and a 1925 Charlie Chaplin film, and that's how you should treat this stack too: a tool for organizing media you have the rights to.
You don't have to follow the earlier parts to use this one. All you need is a Linux machine with Docker and Compose, plus a basic understanding of how Docker works. If that's new to you, read my Docker basics guide first. In the video I'm running it in the Ubuntu virtual machine on Proxmox that I set up in Part 2, with the data share from Part 1 mounted at /data.
The compose file and docs live in my homelab repo under media/, and they've kept evolving since I recorded this. The written steps below follow the repo's current compose.yaml and .env.example. My hands-on walkthrough comes from the video, and I've noted wherever the two differ.
What's in the Stack
| Service | What it does | Web UI port | How other apps reach it |
|---|---|---|---|
| Gluetun | VPN client that the download side of the stack routes through | none | 172.30.50.2 |
| qBittorrent | Torrent client (runs inside Gluetun's network) | 8080 | 172.30.50.2:8080 |
| NZBGet | Usenet client (runs inside Gluetun's network) | 6789 | 172.30.50.2:6789 |
| Prowlarr | Manages indexers and syncs them to the other apps (inside Gluetun) | 9696 | 172.30.50.2:9696 |
| FlareSolverr | Optional helper API for Prowlarr (inside Gluetun) | none needed | 172.30.50.2:8191 |
| Sonarr | TV shows | 8989 | 172.30.50.3:8989 |
| Radarr | Movies | 7878 | 172.30.50.4:7878 |
| Lidarr | Music | 8686 | 172.30.50.5:8686 |
| Bazarr | Subtitles for Sonarr and Radarr | 6767 | 172.30.50.6:6767 |
| Seerr | Requests and discovery for you and your users | 5055 | 172.30.50.7:5055 |
You open each web UI at your server's LAN IP and the port in that table. The 172.30.50.x addresses are for the apps talking to each other.
How the Compose File Is Laid Out
I spent a lot of time making this compose file as easy to use as I could. A few ideas are worth understanding before you run it.
Everything sits on a servarrnetwork bridge, and each service gets a fixed address from .env. That's how the repo's examples connect the apps, so we'll keep that layout. Static addresses aren't a Docker requirement: a user-defined bridge provides service-name resolution, so http://radarr:7878 and http://gluetun:9696 are alternatives for containers on this network. Use Gluetun's name or address for services sharing its network, rather than expecting each of them to have a separate address.
qBittorrent, NZBGet, Prowlarr, and FlareSolverr don't publish ports or get their own IPs. They use network_mode: service:gluetun, which puts them inside Gluetun's network stack, so their ports are listed under the gluetun service and they all share its 172.30.50.2 address. If the VPN isn't up, Gluetun's firewall keeps their traffic from leaving.
Sonarr, Radarr, Lidarr, Bazarr, and Seerr use the ordinary bridge network for their own outbound traffic. They don't inherit Gluetun's VPN connection just by being in the same Compose project.
The containers behind Gluetun wait for it to report healthy during docker compose up. Their depends_on setting restart: true applies to explicit Compose operations, such as docker compose restart gluetun; it doesn't automatically restart dependents after every VPN reconnect or Docker-managed restart. qBittorrent also has a ping health check and a deunhealth.restart.on.unhealthy=true label. The deunhealth helper restarts labeled containers when they become unhealthy. A successful ping checks connectivity, not whether qBittorrent is downloading, so it won't detect every stall. The helper mounts the Docker socket, which gives it root-level control of Docker on this VM.
Every container that touches media gets the same /data:/data bind mount instead of separate /movies, /tv, and /downloads volumes. The Servarr Docker guide explains why. Separate mounts prevent hardlinks across them, even when the files live on the same disk outside the container. A shared path avoids remote path mappings, but hardlinks and instant moves still depend on the underlying filesystem, permissions, and SMB server support. The storage test below checks that instead of assuming it works over our network share.
Each service keeps its config in a folder named after it (./gluetun, ./radarr, and so on) in the directory you run Compose from. Most user settings live in .env. The steps below also make a few targeted changes to the downloaded Compose file: the subnet, Gluetun's health check and published ports, and Seerr's init setting.
The repo currently uses 172.39.0.0/24, which is outside the RFC 1918 private ranges and can mask real public destinations. This article uses 172.30.50.0/24 instead. Before using it, check that it doesn't overlap your LAN, VPN routes, or another Docker network. The download steps below change the subnet and every SET_IP_ value together. If you choose a different unused private range, use it consistently in these steps and the apps' settings.
What's Changed Since I Recorded
If you're following along with the video, here's what's different:
- The repo's network moved from
172.69.0.0/24to172.39.0.0/24. Both are public ranges. We change the downloaded examples to the private172.30.50.0/24range here, so wherever the video shows172.69.0.x, use172.30.50.x. - The repo ships
.env.exampleinstead of.env. You copy it to.envand lock down its permissions (shown below). - Seerr is now part of this stack. In the video I added Jellyseerr to my Jellyfin compose and mentioned I might move it over. I did, and Jellyseerr and Overseerr have since merged into Seerr. My Seerr migration guide covers moving an existing install.
- FlareSolverr was added, routed through Gluetun like Prowlarr.
- The forwarded VPN port is no longer published on the host.
FIREWALL_VPN_INPUT_PORTSnow only goes to Gluetun's firewall and qBittorrent'sTORRENTING_PORT, which is all it needs. SERVER_COUNTRIESandSERVER_CITIESare commented out by default. I set Canada in the video, but those filters can break connections with some providers, so they're opt-in now.HEALTH_VPN_DURATION_INITIALis obsolete in current Gluetun. The repo's.env.examplestill includes it, but since Gluetun v3.41.0 reworked the health check, it only triggers an "obsolete" warning. You can delete the line.- A commented-out Jellystat block was added, and the old ytdl-sub block was removed.
Before You Start: Folders and Permissions
The containers run as the user and group IDs in .env (PUID and PGID, both 1000 by default). Check yours:
id your_user
On most single-user Linux installs, that's uid=1000 and gid=1000. Whatever IDs you use need to be able to read and write everything under /data.
In Part 2, the Samba share is mounted at /data with the VM user's numeric IDs in the mount options. Use those same IDs for PUID and PGID; the Samba credentials must still have write permission on the server. Before creating folders, trigger the mount and verify it:
ls /data
findmnt --mountpoint /data --types cifs
The last command must show the Part 1 share mounted as cifs, not just an empty local folder. Keep Part 2's Docker mount dependency so the daemon waits for the share at boot. If your /data is local storage instead, check its ownership and grant access to the account you intend to use; don't recursively change ownership of an existing media collection as a blanket fix.
I keep all my Docker projects in a root /docker directory on the VM, not on the network share. Jellyfin and a few other apps don't like having their configs on SMB. Make a folder for this stack:
sudo mkdir -p /docker/servarr
sudo chown "$(id -u):$(id -g)" /docker/servarr
cd /docker/servarr
I call mine servarr, but you can name it whatever you like.
Download the Compose File and .env
For a new installation, use the empty project folder above to download the Compose file and environment template, then make your private copy. For an existing stack, back up its files first and compare changes rather than overwriting its .env or downloading duplicate filenames:
wget https://github.com/TechHutTV/homelab/raw/refs/heads/main/media/compose.yaml
wget https://github.com/TechHutTV/homelab/raw/refs/heads/main/media/.env.example
cp .env.example .env
chmod 600 .env
sed -i 's/172\.39\.0\./172.30.50./g' compose.yaml .env
sed -i '/^HEALTH_VPN_DURATION_INITIAL=/d' .env
The .env file is going to hold your WireGuard private key, so keep it at 600 and never commit it anywhere public.
Seerr needs one extra step. Unlike the LinuxServer images, the Seerr image doesn't use PUID and PGID. According to its Docker docs, it runs as the built-in node user, UID 1000. If Docker creates the ./seerr folder for you, root will own it and Seerr won't be able to write to it. Create it first:
mkdir -p seerr
sudo chown 1000:1000 seerr
Add init: true under the seerr service in compose.yaml, as its Docker docs recommend. Seerr's fixed UID 1000 is independent of the PUID and PGID values used by the LinuxServer images.
The repo also overrides Gluetun's built-in health check with a ping. Replace only Gluetun's healthcheck block with the image's own checker so dependent services wait on Gluetun's internal health state:
healthcheck:
  test: ["CMD", "/gluetun-entrypoint", "healthcheck"]
  interval: 20s
  timeout: 10s
  retries: 5
  start_period: 30s
This uses the health-check command shipped in the Gluetun image. Leave qBittorrent's separate check in place for deunhealth.
For this AirVPN setup, remove the 6881:6881 and 8191:8191 entries from Gluetun's ports list. The torrent's incoming connection arrives through the VPN tunnel, and Prowlarr reaches FlareSolverr inside their shared network namespace. Neither needs a published port on the VM. Keep the 8080, 6789, and 9696 mappings for the web interfaces you use.
Set Up the VPN with Gluetun
Gluetun is the most important piece to get right, because everything on the download side depends on it. I use AirVPN. They've never sponsored me or reached out. I picked it after reading through the providers on the Gluetun wiki, and I've been happy with the speeds and the server selection. For another provider, follow its page in Gluetun's provider list. Not every provider supports forwarded ports or the same variables; this article's port settings are specifically for AirVPN.
For AirVPN, here's what I did.
- In the Client Area, open the Config Generator. Pick Linux, enable WireGuard, and choose a single server. I went with one in Vancouver that had good speeds and few users. Scroll to the bottom and click Generate. That gives you a
.conffile with your keys. - Back in the Client Area, go to Ports and add a new port. Note the number, because qBittorrent will listen on it. Nothing is listening yet, so Test open will report
Connection refusedat this point. Come back and test it once Gluetun is connected and qBittorrent is running. If it still fails then, check qBittorrent's listening port and interface before reaching for a different port.
Now open .env:
nano .env
The top of .env looks like this. Fill it in from your generated .conf file:
# General UID/GID and Timezone
TZ=America/Los_Angeles
PUID=1000
PGID=1000

# Input your VPN provider and type here
VPN_SERVICE_PROVIDER=airvpn
VPN_TYPE=wireguard

# Mandatory, airvpn forwarded port
FIREWALL_VPN_INPUT_PORTS=12345

# Copy all these variables from your generated configuration file
WIREGUARD_PUBLIC_KEY=YOUR_PEER_PUBLIC_KEY
WIREGUARD_PRIVATE_KEY=YOUR_PRIVATE_KEY
WIREGUARD_PRESHARED_KEY=YOUR_PRESHARED_KEY
WIREGUARD_ADDRESSES=10.x.x.x/32

# Optional location variables
#SERVER_COUNTRIES=Canada
#SERVER_CITIES=Vancouver
A few notes on those values:
- Set
TZto your own time zone name. FIREWALL_VPN_INPUT_PORTSis the port number you just opened. Gluetun allows it in from the VPN side, and the compose file hands it to qBittorrent as its listening port.- The private key comes from the
[Interface]section, while the public and preshared keys come from[Peer]. Gluetun's AirVPN page only requires the private key, preshared key, and address, so the public key line is optional. If you keep it, use the real key, because Gluetun rejects an invalid value like a leftover placeholder. - For
WIREGUARD_ADDRESSES, copy the IPv4 address from theAddressline. Only include the IPv6 one too if you've set up IPv6 for Gluetun. - The earlier replacement updates all
SET_IP_values to our private subnet. Check that each address still belongs to thesubnetincompose.yaml.
Do not forward this port, or any of the stack's ports, on your router. The forwarded port lives on the VPN server, not on your home connection.
Create the Download Folders
My repo has a one-liner that builds the download layout for both clients. Run these commands as the user whose IDs you selected for PUID and PGID, after verifying the /data mount. The first command inside /data also creates the library folders if you're starting without the earlier parts:
cd /data
mkdir -p movies shows music
mkdir -p downloads/qbittorrent/{completed,incomplete,torrents} && mkdir -p downloads/nzbget/{completed,intermediate,nzb,queue,tmp}
Existing folders are preserved. /data ends up looking like this:
data
├── downloads
│   ├── qbittorrent
│   │   ├── completed
│   │   ├── incomplete
│   │   └── torrents
│   └── nzbget
│       ├── completed
│       ├── intermediate
│       ├── nzb
│       ├── queue
│       └── tmp
├── movies
├── music
└── shows
Launch the Stack and Test the VPN
Back in the stack folder, validate the Compose file without printing its resolved environment, then start only Gluetun:
cd /docker/servarr
docker compose config --quiet
docker compose up -d gluetun
docker compose ps gluetun
Fix any validation errors before continuing. The first image pull takes a minute. Check Gluetun's logs:
docker logs --tail=100 gluetun
You're looking for the public IP line. In the video it showed Vancouver, British Columbia, which matched the server I picked. To be extra sure, spin up a throwaway container on Gluetun's network and ask ipinfo.io where it thinks you are. This is the test from the Gluetun wiki:
docker run --rm --network=container:gluetun alpine:3.22 sh -c "apk add wget && wget -qO- https://ipinfo.io"
Confirm that the public IP matches Gluetun's reported VPN IP and differs from your home connection. Location labels alone aren't enough, and this is a connectivity check rather than a complete DNS or IPv6 leak test. The linked Gluetun page has additional DNS checks.
Once Gluetun is healthy and that test passes, start the remaining services:
docker compose up -d
docker compose ps
You can now check from inside one of the containers routed through Gluetun, like qBittorrent:
docker exec qbittorrent wget -qO- https://ipinfo.io
It should report the same VPN public IP. Don't paste a resolved docker compose config into an issue: it can contain the WireGuard keys loaded from .env.
If Compose reports dependency failed to start: container gluetun is unhealthy, run docker logs gluetun, make sure every placeholder in .env was replaced, and comment out SERVER_COUNTRIES/SERVER_CITIES if you set them. Also check that /dev/net/tun exists on the host. My media README has more troubleshooting, including the extra config Proxmox LXC containers need for the TUN device.
qBittorrent
Open http://YOUR_SERVER_IP:8080. The username is admin, and the password is randomly generated on startup. Grab it from the logs:
docker logs qbittorrent
Log in, go to Settings > WebUI, and set your own username and password under Authentication. Until you do, qBittorrent generates a new temporary password every time the container starts. I restarted the container afterward (docker restart qbittorrent) to confirm the new login stuck.
Then work through a few settings:
- Connection: confirm the listening port matches the
FIREWALL_VPN_INPUT_PORTSvalue from.env. - Advanced: set Network interface to
tun0, the VPN interface in this Gluetun setup. Check it exists withdocker exec gluetun ip address show tun0; if your provider configuration uses another interface, select that one. This binding is separate from Gluetun's firewall. - Downloads: the default save path is
/downloads, but that path isn't mounted in this container. Point it at the folders we just made:
| Setting | Path |
|---|---|
| Default Save Path | /data/downloads/qbittorrent/completed |
| Keep incomplete torrents in | /data/downloads/qbittorrent/incomplete |
| Copy .torrent files to | /data/downloads/qbittorrent/torrents |
To test it, I grabbed the official Ubuntu Desktop torrent from Ubuntu's alternative downloads page, pasted the link into qBittorrent, and it connected to peers and started downloading right away.
NZBGet (Optional)
Usenet isn't used as often, and I'm not getting into that whole topic here, but the client is in the stack if you want it. Open http://YOUR_SERVER_IP:6789. The LinuxServer image starts with the username nzbget and the password tegbzn6789, so change those first.
- Settings > Security: change
ControlUsernameandControlPassword, save, and reload. Log in again with the new credentials. - Settings > Incoming NZBs: set
AppendCategoryDirto No. Sonarr and Radarr handle categories themselves, and this avoids "directory does not appear to exist" errors. - Settings > News-Servers: add your Usenet provider's hostname, credentials, TLS port, and connection limit. Use the provider's published settings and test the connection; installing NZBGet alone doesn't provide Usenet access.
- Settings > Paths: set these, save, and reload.
| Setting | Value |
|---|---|
MainDir | /data/downloads/nzbget |
DestDir | ${MainDir}/completed |
InterDir | ${MainDir}/intermediate |
The README also discusses local intermediate storage. If unpacking on the share is slow, the LinuxServer instructions show how to add a local bind mount such as ./nzbget-intermediate:/intermediate and set InterDir to /intermediate. Allow enough local disk space for unpacking. This is an optional I/O trade-off; it doesn't protect against an absent /data mount. Keep the mount check from Part 2, and pause downloads during a storage outage.
Prowlarr
Prowlarr manages your indexers in one place and syncs them to Sonarr, Radarr, and Lidarr, so you don't configure them in each app. Open http://YOUR_SERVER_IP:9696, choose Forms (Login Page) for authentication, and create your login.
Indexers are the one thing I can't show you. Find your own, do your research, and use sources that comply with the laws where you live and the rights on the content. Once you add one under Indexers, the "no indexers" health warning under System goes away.
Next, add the download clients under Settings > Download Clients. These are what Prowlarr uses when you grab something straight from its own search page. I use Gluetun's address, 172.30.50.2, for consistency with the other apps. Prowlarr and both clients share the same network namespace, so 127.0.0.1 also works for these particular connections; Sonarr and Radarr need Gluetun's network address or name.
- NZBGet: host
172.30.50.2, port6789, plus the credentials you set. I changed the default category to movies. Test, then save. - qBittorrent: host
172.30.50.2, port8080, plus your credentials. Test, then save.
Then connect the apps under Settings > Apps. They all work the same way, so I'll show Radarr. First open Radarr at http://YOUR_SERVER_IP:7878, set up its login the same way, then go to Settings > General and copy the API Key. In Prowlarr, add a Radarr application:
| Field | Value |
|---|---|
| Prowlarr Server | http://172.30.50.2:9696 |
| Radarr Server | http://172.30.50.4:7878 |
| API Key | Radarr's API key |
Test and save. Sonarr is the same with http://172.30.50.3:8989, and Lidarr uses http://172.30.50.5:8686. There are a lot more options on that screen, and the Prowlarr settings page on the Servarr wiki explains them all. After this, you rarely need to open Prowlarr again.
The current compose also includes FlareSolverr, which Prowlarr can use as an indexer proxy for sites behind Cloudflare challenges. It wasn't in the stack when I recorded the video. If you need it, the media README explains how to connect it. Otherwise you can remove that service.
Radarr, Sonarr, and Lidarr
Setup is almost identical across the three apps, so I'll walk through Radarr. For Sonarr, swap in TV shows, /data/shows, and port 8989. Lidarr uses music, /data/music, and port 8686.
Import Your Existing Library
Go to Library Import and choose /data/movies. Radarr scans the folder and matches each movie it finds. The first time you do this, double-check the matches. Mine were Cast Away, A Bug's Life, and a couple of others, all correct. You can set a quality profile here, then import. Give it a refresh and the posters, cast, crew, file paths, and alternate titles all fill in. Radarr also makes /data/movies a root folder, where it will put new movies.

Renaming
This is one of the cool things about these apps, especially in Sonarr when you have a show with a bunch of seasons at ten episodes each. Go to Settings > Media Management and turn on Rename Movies. The standard format includes the title, year, and quality. Back on a movie, Preview Rename shows the before and after, and Organize applies it. Do note that Jellyfin and Plex both have naming preferences, so check what your media server expects before you go wild with custom formats.

Add a Download Client
Under Settings > Download Clients, add qBittorrent with host 172.30.50.2, port 8080, and your credentials. If you use Usenet, add NZBGet at 172.30.50.2:6789 too. Use distinct categories for each manager, such as radarr, sonarr, and lidarr, so they don't process each other's downloads. Configure the corresponding categories in the clients, then test and save each connection. Adding clients in Prowlarr doesn't replace this step. In the video, I'd forgotten it at first, and Radarr showed a "missing download client" warning until I added it.
For Lidarr, use an artist/album library rooted at /data/music and add its own download-client category. If artist lookup or imports fail while the other apps work, check the official Lidarr README for metadata-service status before changing the Docker network or VPN settings.
Test It with Something Legal
To test the full pipeline, I added The Gold Rush, Charlie Chaplin's 1925 film. Duke's Public Domain Day 2021 overview explains that the original film was already in the US public domain because its copyright wasn't renewed. Check the particular edition and your location; later soundtracks or restorations can have separate rights. I added it with Search unchecked, fixed the download client, and then searched from the movie's page. Radarr sent the release to qBittorrent, which downloaded it into incomplete and moved it to completed. Radarr then imported it into /data/movies/ with my rename format applied.

Radarr hardlinks imports when your storage supports it and copies them when it doesn't, so seeding torrents can keep their original files either way. Then I opened Jellyfin on port 8096, the server from Part 2, and The Gold Rush was sitting in my movies library. Will you look at that.
To check hardlink support across the actual download and library paths, use a disposable file inside the Radarr container. Run as the numeric PUID:PGID you configured, replacing 1000:1000 if needed:
docker exec --user 1000:1000 radarr sh -c '
  set -eu
  source=$(mktemp /data/downloads/qbittorrent/completed/.hardlink-test.XXXXXX)
  target_dir=$(mktemp -d /data/movies/.hardlink-test.XXXXXX)
  trap "rm -f \"$source\" \"$target_dir/link\"; rmdir \"$target_dir\"" EXIT
  ln "$source" "$target_dir/link"
  ls -li "$source" "$target_dir/link"
'
If ln fails, check the error before expecting hardlinks from Radarr. Cross-device errors mean these paths aren't linkable as mounted; permission errors need an ownership/access fix. Copy-based imports still work, but consume additional space while the torrent is retained. A working test doesn't change files you've already imported.
Quality Definitions and File Sizes
To keep file sizes reasonable, go to Settings > Quality. Each quality has a slider for minimum, preferred, and maximum size. Radarr works these out per minute of runtime, and the slider labels show them as gigabytes per hour. For Bluray-720p, for example, I aimed for about a gig per hour preferred and capped it at roughly three gigs per hour. Radarr won't grab anything above the maximum. The Radarr settings docs cover quality profiles and custom formats if you want more control.

Bazarr for Subtitles
Bazarr finds subtitles for everything Sonarr and Radarr manage. You'll need an account with a subtitle provider such as OpenSubtitles. Open http://YOUR_SERVER_IP:6767.
- Settings > Radarr: enable it, set the host to
172.30.50.4, port7878, and paste Radarr's API key. Click Test, and you should see Radarr's version. Save it, and Bazarr starts syncing your movies. Do the same under Settings > Sonarr with172.30.50.3and port8989. - Settings > Languages: set your language filter (I used English), add a languages profile containing that language, and save. Assign it as the default for new series/movies, then apply it to existing items from their library pages. Creating a profile alone doesn't assign it to your library.
- Settings > Providers: enable your subtitle provider and sign in.
Bazarr didn't ask me to create a login on first run the way the Servarr apps did. Under Settings > General > Security, set the authentication type to Forms so anyone on your network can't open it. I didn't have every Bazarr setting dialed in on my own server yet, so for anything beyond the basics, follow the Bazarr setup guide.
Seerr for Requests and Discovery
The last piece is the request front end. In the video, I used Jellyseerr from my Jellyfin compose, so it had to reach Radarr through the server's LAN IP. Today it's Seerr, the merged Overseerr/Jellyseerr project. It's already in this compose at 172.30.50.7, and it works with Jellyfin, Plex, and Emby. The setup steps match what I showed in the video, though a screen or two may look a little different.
- Open
http://YOUR_SERVER_IP:5055and choose your media server. I picked Jellyfin. - Enter your Jellyfin URL. Jellyfin runs in its own compose, so use the server's LAN address, for example
http://YOUR_SERVER_IP:8096. Then enter an email address and your Jellyfin username and password. - Select your Movies and Shows libraries and start the scan.
- Add a Radarr server: host
172.30.50.4, port7878, and Radarr's API key. Mark it as the default server and click Test. That loads your quality profiles. I picked Any, set minimum availability to Released, and added the server. - Add Sonarr the same way with
172.30.50.3and port8989, then finish setup.
I use Seerr to find something to watch. You can share it with other people, or just use it yourself, to browse what's popular and filter by streaming service, genre, rating, and whatnot. I filtered for Apple TV titles, since I don't subscribe to it, and limited results to titles with a user score of 8 or higher. When something catches your eye, Request sends it straight to Radarr or Sonarr.

I requested Napoleon that way, and it showed up in Radarr immediately. Then I went shopping for a DVD so I could buy a copy and put it on the server, and the listing I found only offered streaming, no physical copy. Very disappointing. I couldn't find a copy to buy for my own library. I'd much rather have that option than keep switching between streaming apps.
Keep It Locked Down
- Change every default credential, set a login on every app (including Bazarr), and keep
.envatchmod 600. - Don't port-forward any of these web UIs on your router. For remote access, use a VPN like NetBird or a proper reverse proxy, which is where Part 4 comes in.
- Every image uses the
latesttag, so skim the release notes before adocker compose pull.
Back Up and Update the Stack
Keep .env, compose.yaml, and each service's configuration directory in a protected backup on separate storage. Stop the stack with docker compose down before making a file copy of its databases; preserve ownership and permissions. Record the image versions, and keep the media/download backup separate from the local application configuration. Don't use down -v as an update step.
After the backup and release-note review, pull the intended images with docker compose pull. Start Gluetun first and repeat the VPN test above before bringing up the rest. Use docker compose ps and service logs to check startup, then test client connections, a disposable import, subtitles, and a Seerr request. A migrated database may need its matching old image and pre-upgrade backup to roll back, so test recovery in an isolated VM before relying on it.
Final Thoughts
This is the stack I run, and it got this polished because people using the repo kept sending fixes. Once Gluetun is connected and the apps are pointed at each other, you request something, it lands in the right folder with the right name, and Jellyfin picks it up.
The setup that keeps this from falling apart is a single /data path, static IPs, and a VPN that is really up before anything else starts. Get those right and the rest is mostly clicking through settings pages. For more tuning, the Servarr and Bazarr wikis are good, and my media README collects the fixes I've needed along the way.
Next Up
Right now everything here lives at an IP address and a port number. In Part 4: SSL certificates on everything, we give these services real local domain names with valid SSL certificates, and look at reaching them securely when you're away from home. With all that, I do hope you found this helpful. Have a great one.