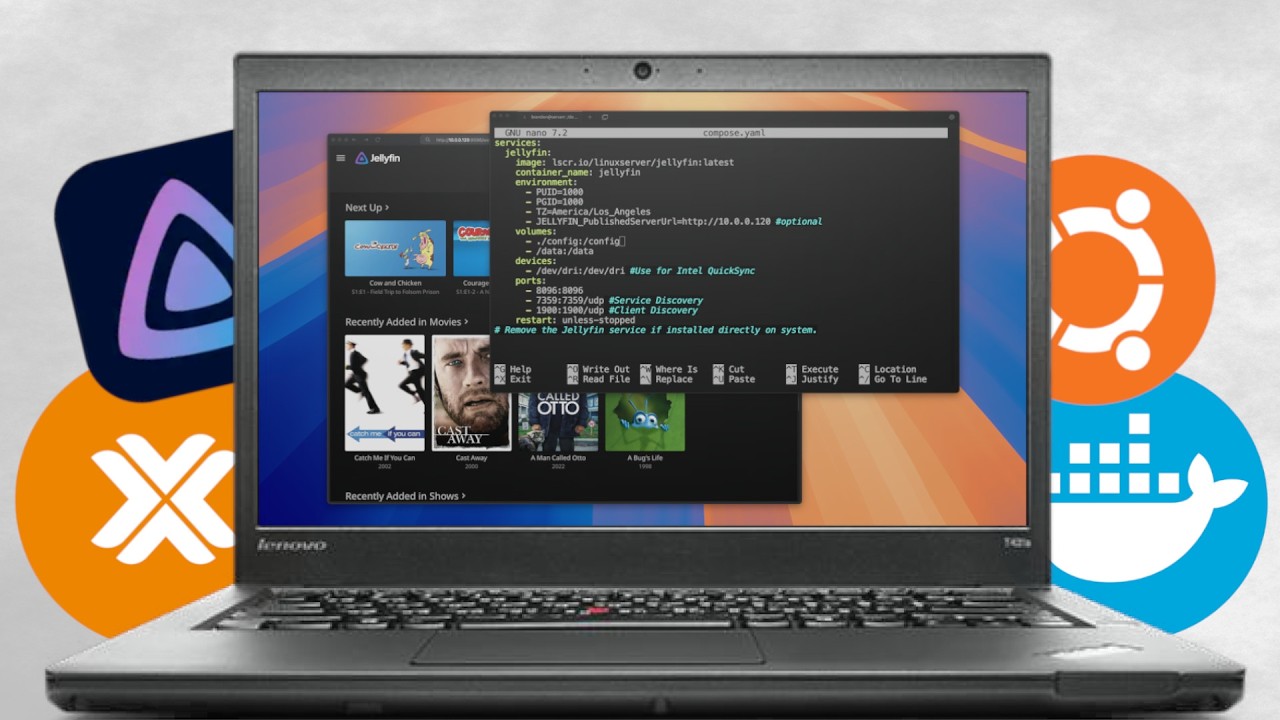


The Ultimate Home Server series
- Part 1: Proxmox, ZFS, and Samba shares
- Part 2: Jellyfin media server VM
- Part 3: The automated *arr stack
- Part 4: SSL certificates on everything
In Part 1 we built the foundation: a Proxmox node, ZFS storage, and a container sharing a data folder over Samba. Now it's time to put something fun on top of it. We create a dedicated virtual machine, get Ubuntu Server and Docker running, pass through Intel Quick Sync, mount the data share, and spin up Jellyfin with working hardware transcoding.
The last time I did this series, the media server was Plex. With the direction Plex has been heading, I don't recommend it the way I used to, so this time it's Jellyfin. If you still prefer Plex, I keep a Plex folder in my homelab repo, and the process is almost identical.
The source of truth for this series is the media directory in my homelab repo, with the Jellyfin-specific steps in media/jellyfin. This article follows that layout: one /data share, local application configuration, and the LinuxServer.io Jellyfin image. The Jellyfin notes use a credentials file instead of putting the Samba password in fstab, and that's what we'll do here.
The steps below are for Jellyfin 12.4, released October 26, 2026, and Ubuntu Server 26.04.1 LTS. I recorded the video in May 2025, so a few screens may look different. I've marked the changes from the video and the repo where current upstream guidance makes the setup more reliable.
What We're Building
How the pieces fit together by the end of this part:
| Piece | Where it lives | What it does |
|---|---|---|
Media container (100 from Part 1) | Proxmox LXC | Holds the ZFS-backed data folder and shares it over Samba |
servarr VM | Proxmox VM running Ubuntu Server | Runs Docker, Jellyfin now, and the *arr stack in Part 3 |
/data | Samba share mounted in the VM | Movies, shows, music, and later downloads |
/docker | The VM's local disk | Compose files and app configuration |
| Intel iGPU | Passed through to the VM | Quick Sync hardware transcoding for Jellyfin |
I called the VM servarr because it's going to hold all the *arr applications as well as the media server.
Why a VM This Time
I'll be honest: my main Proxmox server doesn't follow best practices. I run Jellyfin, Plex, and a pile of Docker containers in an unprivileged LXC. It works for me, but it isn't the approach Proxmox recommends. Their container documentation still says that nesting containers inside a QEMU VM is the recommended practice when you need maximum isolation or live migration.
I ran a poll on YouTube asking how you all do it. The results were pretty split, but the general consensus was that a guide should follow best practices. So that's what we're doing: Docker runs in a VM, and the VM mounts the share from Part 1.
If you'd rather keep everything in the LXC from Part 1, you can skip the VM sections and start at the Jellyfin installation. You'll need some extra steps to get Quick Sync working in an unprivileged container. Those are in my Jellyfin notes and the Proxmox LXC section of Jellyfin's Intel guide. Either way, I recommend Docker over a direct system installation of Jellyfin because you run into fewer permission issues, though my notes cover both.
Create the Virtual Machine
Download Ubuntu Server to Proxmox
Use whatever server distribution you're most comfortable with. Mine is Ubuntu Server. On the Ubuntu Server download page, right-click the download button and copy the link address. In Proxmox, select the storage that holds ISO images (usually local), open ISO Images, click Download from URL, paste the link, and download it straight to the server. Depending on your internet speed, you'll have time for a water break. Out of everything in this guide, hydration is the most important step.
VM Settings
Click Create VM in the top-right corner and use these settings:
| Tab | Settings for this walkthrough | Notes |
|---|---|---|
| General | Name: servarr | Name it whatever you like |
| OS | The Ubuntu Server ISO | |
| System | q35, OVMF (UEFI), with an EFI disk | A starting point for GPU passthrough; the video used defaults |
| Disks | 64 GB | Docker images and app config live here; the media stays on the share |
| CPU | 6 cores | Four is roughly what I'd recommend for everything in this series |
| Memory | 8192 MiB | About 8 GB |
| Network | Default bridge (vmbr0) |
Confirm and click Finish. Don't start the VM yet.
The 64 GB disk is the video's starting size, not a capacity target for every library. Jellyfin's storage guide notes that a moderate library's database can occupy 10–100 GB, with additional space needed for transcodes. Give this VM more local disk space if you have a large collection, and monitor free space as it grows.
Pass Through Intel Quick Sync
Before booting the VM, give it the Intel graphics built into the CPU. That's what Jellyfin will use for hardware transcoding, and in Jellyfin it's completely free.
Passthrough is optional if you only need direct playback or your CPU can handle the required software transcoding. In that case, skip the GPU steps and remove the devices section from the Compose example later.
- Select the VM and open Hardware.
- Click Add > PCI Device.
- Choose Raw Device and select the Intel graphics device. On my machine it showed up as the Intel Alder Lake graphics controller. Yours may have a different name or number, but it usually mentions graphics.
- Check All Functions to include the device's functions. On the q35 VM, enable PCI-Express, then click Add. Leave Primary GPU off for this headless transcoding setup so you retain Proxmox's virtual console.

A few things to know before you rely on this:
- IOMMU has to work on the host. Enable VT-d in your BIOS. According to the Proxmox passthrough documentation, Intel IOMMU is enabled by default on kernels 6.8 and newer, and older kernels need
intel_iommu=on. My storage notes include thedmesgchecks. - The device belongs to the VM now. Once it's passed through, the Proxmox host and other guests, including the Part 1 container, can't use it.
- Machine type and isolation. I kept the default system settings in the video, and passthrough worked. For a new VM, the Proxmox passthrough guide recommends q35 and OVMF for GPU compatibility. It also explains IOMMU groups: don't pass a device through if its group contains unrelated devices the host still needs. Choose the firmware before installing Ubuntu rather than changing it afterward.
- No live migration. VMs with passed-through devices can't be live-migrated. That's not a concern on a single-node homelab.
If your CPU doesn't support Quick Sync, an Intel Arc GPU is what I recommend. I'm only covering Intel here. Jellyfin's AMD and NVIDIA guides cover those cards.
Install Ubuntu Server
Start the VM, open Console, and choose the option to install Ubuntu Server. The installer is pretty straightforward:
- Pick your language and keyboard layout. I also enabled the search for third-party drivers, which usually isn't needed.
- Network: my router assigned the VM an address ending in
.120over DHCP. I usually like matching IPs to Proxmox IDs, but that address was taken, so I kept the one it gave me. A DHCP reservation in your router or a static IP keeps it from changing later. - Skip the proxy and let it test the mirror.
- Storage: this is the one place I change something. It's just a VM, so I uncheck the option to set up the disk as an LVM group. I want the whole disk on the root mount without extra partitioning.
- Profile: set your name, a hostname (I matched it to
servarr), a username, and a decent password. - Skip Ubuntu Pro.
- SSH: select the option to install OpenSSH server. Logging in from a terminal makes copying and pasting commands much easier.
- Skip the featured server snaps. They're tempting, but most of them are snap packages, and we're using Docker.
When Reboot Now appears, remove the ISO from the VM's Hardware tab and continue the reboot. If the installer is still stuck on the ISO, reboot the VM from Proxmox.
First Boot
Log in once through the console to confirm the network is working, then switch to SSH from your own machine:
ssh your-user@10.0.0.120
Replace the username and IP with your own. The first thing you do on any Linux installation is update it:
sudo apt update
sudo apt upgrade
When I first logged in, I got a warning that bash couldn't change the locale. If you see something like setlocale: LC_ALL: cannot change locale, generate the locale it's complaining about:
sudo apt install locales
sudo locale-gen en_US.UTF-8
Swap en_US.UTF-8 for the locale named in your warning. After a round of updates, reboot once with sudo reboot and SSH back in.
Install Docker
If Docker is new to you, my Docker basics guide covers installation, non-root usage, and the essential commands. In short, Docker makes it easy to spin up applications without installing them directly on the host and managing their services by hand.
I use Docker's convenience script. Running random scripts on your Linux machine generally isn't a good idea, so it's worth seeing what it will do before you run it. This one comes directly from Docker:
sudo apt install ca-certificates curl
curl -fsSL https://get.docker.com -o get-docker.sh
sudo sh ./get-docker.sh --dry-run
sudo sh ./get-docker.sh
Docker's Ubuntu install guide says the convenience script isn't recommended for production, and it isn't meant for upgrading an existing installation. If you prefer the apt-repository method, follow that page instead. Both end with the same Docker Engine and Compose plugin, and Docker currently supports Ubuntu 26.04, 24.04, and 22.04.
So you don't need sudo for every Docker command, add your user to the docker group and refresh your session:
sudo usermod -aG docker $USER
newgrp docker
Do note that Docker's post-install docs warn that the docker group grants root-level privileges. Only add users you trust with root.
Before continuing, verify both Engine access and the Compose plugin:
docker run --rm hello-world
docker compose version
Check Quick Sync Inside the VM
Make sure the passed-through GPU showed up:
ls -l /dev/dri
I see card0, card1, and renderD128. That render device is going to be our best friend because it's how Jellyfin uses Quick Sync. Your numbers may differ if you have more than one GPU.
In the video I also added my user to the render group:
sudo usermod -aG render $USER
That isn't strictly required for the container we're using. LinuxServer.io's Jellyfin image documentation says it automatically gives the container's user access to a mounted /dev/dri device. Jellyfin's official image instead uses group_add with the host's render group ID.
Now install Intel's GPU tools on the VM and check that the GPU responds:
sudo apt install intel-gpu-tools
sudo intel_gpu_top
Mine showed the Intel Alder Lake graphics on card1. Press Ctrl+C to exit. We'll use this tool again when we test transcoding.
Mount the Data Share
Keep Docker Configuration Off the Share
Previously I put virtual drives into LXCs. With a VM, the cleanest approach is to mount the network share from Part 1 directly.
After some trial and error, I learned an important lesson: Jellyfin and some other containers don't like it when their configuration lives on a network share. It's mostly an SQLite problem. Jellyfin's storage documentation agrees: the database should be stored locally, and network storage should be mounted directly by the operating system.
So the plan is:
/datais the Samba share with all the media./dockeris a regular folder on the VM's own disk for compose files and configuration.
Part 1 also created a docker share. We're not using it for container config in this VM.
Create the Folders and Set Permissions
I like to keep everything in a root-level data folder, with movies, music, shows, and later downloads inside it. Using the same /data path on the host and in every container helps avoid path problems with download clients in Part 3. Putting Docker files in /docker is 100% my preference. A folder in your home directory works fine too.
Check your user and group IDs. On most systems, the first user is 1000:
id -u
id -g
Create both folders before mounting the share, and give your user ownership of the local Docker folder. The mount options below control how ownership appears on the mounted SMB share; Samba still enforces the server-side permissions from Part 1.
sudo mkdir -p /data /docker
sudo chown "$USER:$(id -gn)" /docker
Use the numeric IDs you just checked wherever 1000 appears in fstab and the Compose example. There's no need to recursively change ownership on the share or an existing application directory.
Mount the Share with fstab
Install the CIFS tools:
sudo apt install cifs-utils
In the video I typed the Samba username and password directly into /etc/fstab and mentioned that a credentials file was the better option. My notes now use the credentials file, so do that. The mount.cifs manual recommends it over keeping passwords in plain text in a shared file like /etc/fstab.
sudo mkdir -p /etc/samba
sudo touch /etc/samba/credentials
sudo chown root:root /etc/samba/credentials
sudo chmod 600 /etc/samba/credentials
sudo nano /etc/samba/credentials
Use the Samba user and password from Part 1:
username=your-samba-user
password=your-samba-password
The file is restricted to root before you enter the password. The credentials file still contains plain text, so protect it in backups too.
Next, find the IP of the Part 1 container. Running ip a in its console works. Mine was a different address from the one in my notes, so check yours instead of copying mine. Then open fstab, the file that controls all the mounts on your system:
sudo nano /etc/fstab
Add the share at the bottom, replacing 10.0.0.100 with your container's IP:
# Remote shares
//10.0.0.100/data /data cifs x-systemd.automount,uid=1000,gid=1000,credentials=/etc/samba/credentials,iocharset=utf8 0 0
uid and gid make files on the share appear as owned by your VM user, matching the IDs Jellyfin will run as. They don't grant access on the Samba server; the credentials must belong to the allowed user from Part 1. x-systemd.automount defers the mount until first access. It helps with boot ordering, but it doesn't guarantee that the share is reachable when an application first needs it.
Reload systemd, activate this automount, and access it to trigger the mount:
sudo systemctl daemon-reload
sudo systemctl start data.automount
ls /data
findmnt --mountpoint /data --types cifs
The last command must show //10.0.0.100/data mounted at /data with type cifs. If it prints nothing or the listing fails, fix that before creating folders or starting Jellyfin. Seeing an empty local /data directory doesn't prove the share is mounted. findmnt distinguishes the actual CIFS mount from the automount placeholder.
Before mounting, /data was just an empty folder. My share already had media on it, so now I can see movies and shows, with some pretty good stuff: some Charlie Brown, A Bug's Life, Cast Away, and Catch Me If You Can.
If you're starting from the empty share in Part 1, create the folders the rest of the series uses, then copy your media into them over the network share:
mkdir -p /data/{movies,shows,music}
The VM depends on the Part 1 container for its media. Enable Start at boot on both guests, then set their Start/Shutdown order so the media container starts first, with a startup delay before the VM. The Proxmox startup order documentation explains those settings. A delay helps, but it isn't a check that Samba is ready.
Make Docker Wait for the Share
For this dedicated media VM, make Docker wait for /data before it restores containers at boot. This adds a dependency missing from the repo's simple automount example:
sudo systemctl edit docker.service
Add this override:
[Unit]
RequiresMountsFor=/data
RequiresMountsFor orders the service after the required mount and makes startup depend on it. Reload the configuration, then restart Docker before creating the Jellyfin container:
sudo systemctl daemon-reload
sudo systemctl restart docker
This affects all Docker containers in this VM, so it's appropriate when they depend on this media share. If the share is unavailable at startup, Docker waits for the mount attempt and fails if it cannot mount. After fixing Samba, run sudo systemctl start data.mount and sudo systemctl start docker. This guards startup; it doesn't monitor an outage after Jellyfin is running. Jellyfin's storage documentation warns that maintenance tasks can remove library entries while media is unavailable. Stop Jellyfin during an extended storage outage rather than scanning an empty library.
Run Jellyfin with Docker Compose
Create a folder for Jellyfin inside /docker. This is where the compose file and its configuration will live:
mkdir -p /docker/jellyfin
cd /docker/jellyfin
nano compose.yaml
The compose file in my repo also includes Jellystat. I'm skipping it here and just using the Jellyfin service. If you want Jellystat later, I have a separate Jellystat guide.
services:
  jellyfin:
    image: lscr.io/linuxserver/jellyfin:latest
    container_name: jellyfin
    environment:
      - PUID=1000
      - PGID=1000
      - TZ=America/Los_Angeles
      - JELLYFIN_PublishedServerUrl=http://10.0.0.120:8096 # optional
    volumes:
      - ./config:/config
      - /data:/data
    devices:
      - /dev/dri:/dev/dri # Intel Quick Sync
    ports:
      - 8096:8096
      - 7359:7359/udp # optional: client discovery
    restart: unless-stopped
What to pay attention to:
PUIDandPGID: the user and group the container runs as. I run everything as my default user,1000:1000, to keep permissions consistent across the server.TZ: change this to your own time zone name, such asAmerica/New_York.JELLYFIN_PublishedServerUrl: optional. It's the address Jellyfin gives clients that find it through discovery, so use your VM's IP. I've included:8096because that's the port Jellyfin listens on../config:/config: creates aconfigfolder next to the compose file, so mine ends up at/docker/jellyfin/configon the VM's local disk. LinuxServer.io notes that this folder can grow to 50 GB or more for large collections./data:/data: the mounted share appears inside the container at the same path. Every container in this series uses that same scheme./dev/dri: the GPU devices we checked earlier.- Ports:
8096is the web interface.7359/udpis optional client discovery, as in the repo.
I've left out the repo's 1900/udp mapping: DLNA moved to a plugin in 10.9, and it needs host networking under Docker rather than just a published port. The two ports above match Jellyfin's official container example. As my Jellyfin notes explain, client autodiscovery may also fail through Docker's bridge networking. Connect manually to http://SERVER-IP:8096 first. If you need discovery with host networking, replace the entire ports section with network_mode: host; don't combine the two.
Save with Ctrl+O and exit with Ctrl+X. For the very first run, I like to start it in the foreground so any errors show up right away:
docker compose config --quiet
findmnt --mountpoint /data --types cifs
docker compose up
Fix any Compose errors or missing mount before the up command. If the share was restored after Jellyfin had already started with the wrong mount, run docker compose up -d --force-recreate from /docker/jellyfin once findmnt confirms it is mounted. Recreating the container refreshes its bind mount.
Give it a minute. Once it settles down without errors, browse to http://10.0.0.120:8096 with your VM's IP to make sure it loads. Then press Ctrl+C, which stops the container, and start it again in the background:
docker compose up -d
Refresh the page, give it a minute, and you should see the Jellyfin welcome screen.
Jellyfin's networking documentation says opening a port directly to the internet is insecure and recommends a reverse proxy or VPN. Keep this LAN-only for now. Docker's install guide also warns that published container ports bypass ufw and firewalld rules. Remote access and HTTPS come later in the series.
The Setup Wizard
The setup wizard only takes a couple of minutes:
- Pick your language.
- Create the administrator account with a strong password.
- Add your libraries. Because we mounted the data folder, the folder picker shows
/configand/data. I added a Movies library pointing to/data/moviesand a Shows library pointing to/data/shows. The defaults are generally a good starting point. - Set your preferred metadata language and country.
- Remote access. I enabled automatic port mapping in the video. Jellyfin's current setup guide recommends keeping it disabled unless you specifically need it because it relies on UPnP, which has security concerns. I'd leave it off.
- Click Finish and sign in.

Once it dropped me into the dashboard, my movies and shows were there, and it looks absolutely beautiful.

Test Permissions and Hardware Transcoding
I like to check the two things most likely to break before calling it done.
Write Permissions
Jellyfin only needs to read your media to stream it. Write access is what lets deletes from the interface work, along with features that save files next to your media. If you want a playback-only server, mount the share read-only with /data:/data:ro instead. I kept write access. In the video, I deleted a movie from its menu with Delete media, and it was removed without any errors.
That deletes the actual file on the share, not just the library entry. Test it with a throwaway file you're happy to lose, not something from your real collection. If the delete fails, recheck the uid and gid in fstab, the PUID and PGID in the compose file, and the Samba permissions from Part 1.
Hardware Transcoding
In Jellyfin, open the Dashboard and go to Playback > Transcoding:
- Set Hardware acceleration to Intel QuickSync (QSV).
- Set the QSV device to the render node,
/dev/dri/renderD128. - Leave the rest at the defaults for now and click Save.

There are a lot more settings on that page. Jellyfin's Intel guide recommends unchecking codecs your GPU can't decode, and it explains low-power encoding. That mode is on by default on Linux for 12th-generation (Alder Lake) and newer GPUs, while some older generations need extra firmware setup.
To test it, play something and force a transcode by picking a lower quality from the player's settings. I played some John Adams, skipped ahead, and opened Playback Info, which showed the stream was transcoding. Then, on the VM:
sudo intel_gpu_top
The video engine should be busy. If it is, Quick Sync is doing the work instead of your CPU.
If you want to check the drivers from inside the container, use the DRM display explicitly so this works without a desktop session. Jellyfin documents the bundled vainfo tool for the official image; LinuxServer.io also includes jellyfin-ffmpeg:
docker exec -it jellyfin /usr/lib/jellyfin-ffmpeg/vainfo --display drm --device /dev/dri/renderD128
Already Running Jellyfin from the 2025 Video?
The repo's latest tag follows stable releases; it doesn't stay on the version described in this article. Check the release notes before pulling a new image, and use a specific published LinuxServer.io version tag if you want to control upgrades.
Follow the current Jellyfin upgrade sequence rather than jumping straight from an old image to latest. Its example goes from 10.10.7 through 10.11.10 before 12.4. Bring each required intermediate release to its latest patch and let it start and finish migrations before proceeding. Also review the 12.0 migration notes for plugin and account compatibility.
For a file backup, run docker compose down from /docker/jellyfin, then copy the complete local config directory and compose.yaml to separate backup storage, preserving ownership and permissions. Record the image version too. Don't copy the SQLite database while Jellyfin is writing to it. The Jellyfin backup guide explains the supported backup and restore methods.
Once the backup is complete and you've selected the appropriate next image, run:
docker compose pull
docker compose up -d
docker compose logs --tail=100 -f jellyfin
Let any migrations finish, check playback and transcoding, and keep the pre-upgrade backup until you've tested the new version. To roll back a migrated database, restore the matching old configuration and image rather than just changing the image tag. Back up /data separately as described in Part 1; the local Jellyfin config backup doesn't contain your media. Test a restore in an isolated VM before relying on it.
Final Thoughts
My own server still runs everything in one LXC. This VM layout is the cleaner way to build it. The VM keeps Docker away from the Proxmox host, the media stays on the ZFS pool from Part 1, and the configuration lives on a local disk where SQLite is happy. The one thing I'd really stress is that last part: keep your container configuration off the network share. That one cost me some trial and error.
Hardware transcoding came down to a handful of steps: add the PCI device, check /dev/dri, map it into the container, select QSV in Jellyfin, and watch intel_gpu_top get busy.
The video was getting long, so I split the *arr applications into their own part. All the documentation lives in my homelab repo, and a lot of it has improved thanks to people who submitted issues and contributions. If you find a better method or a better app, it's all open for suggestions.
Next Up
In Part 3: The automated *arr stack, we use this same VM to run the download clients and *arr applications. They'll share the /data scheme we set up here, so new media lands in the same folders Jellyfin's libraries already watch. With all that, I do hope you have an absolutely beautiful day.