

The Ultimate Home Server series
- Part 1: Proxmox, ZFS, and Samba shares
- Part 2: Jellyfin media server VM
- Part 3: The automated *arr stack
- Part 4: SSL certificates on everything
By this point in the series the server is doing real work: storage, Jellyfin, and the *arr apps. But every one of them still lives at an IP address and a port number, and half of them greet you with a browser warning. I'm getting rid of all of that. Every service gets a proper domain name and a valid Let's Encrypt certificate, so Proxmox shows a padlock instead of a "your connection is not private" page and I never have to remember another port.
There are two setups here:
- A public domain for the handful of things I want reachable from the internet (a test page and Jellyfin here), using Nginx Proxy Manager, Cloudflare, and a dynamic DNS container.
- A local domain for everything else, reached at home or through NetBird. It gets real certificates too. Private DNS answers are only the addressing scheme; access lists and network policies below enforce who can connect.
I recorded this video in 2024 for my earlier Proxmox series (it was Part 3 back then) and later listed it as Part 4 of this 2025 series, so a few names, IPs, and container layouts differ from Parts 1-3. The written guide follows the proxy folder of my homelab repo, including NetBird in place of the video's remote-access setup. In full disclosure, I work for NetBird.
The updated example uses Nginx Proxy Manager v2.17.1, cloudflare-ddns v1.18.0, and NetBird v0.83.1. The first-login screen and remote-access steps differ from the video. The DDNS release includes HTTPS security fixes, so pull a current image rather than reusing an old cached one.
How the Pieces Fit Together
| Public domain | Local domain | |
|---|---|---|
| DNS record points to | Your home public IP (kept current by DDNS) | The private LAN IP of Nginx Proxy Manager |
| Cloudflare proxy | On for normal web apps, off for media streaming | Off |
| Router port forwarding | TCP 443 to the proxy; TCP 80 if you want HTTP redirects | None for private access |
| Certificate | Let's Encrypt wildcard via DNS challenge | Let's Encrypt wildcard via DNS challenge |
| Reachable from | Anywhere you allow public access | Your LAN and authorized NetBird devices, with the access rules below |
The trick that makes the local half work is the DNS challenge. Let's Encrypt never has to connect to your server. It only checks a TXT record that Nginx Proxy Manager creates through the Cloudflare API, so a domain that points at 10.0.0.203 can still get a publicly trusted certificate. The DNS-01 challenge is also the only way to get wildcard certificates, which is why I use it for both domains.
What You Need
- A domain managed in Cloudflare for public access, and ideally a second one for local use. I use two separate domains. A subdomain of your public domain (like
home.example.com) also works, but it needs its own wildcard certificate, because*.example.comdoes not coverproxmox.home.example.com. Cloudflare's add a site guide walks through moving a domain over. - A Docker host on your LAN where ports 80, 81, and 443 are free. In the video this is a dedicated Ubuntu 22.04 LXC on Proxmox with Docker and Portainer, set up the same way as my other Docker containers. Any Docker host works. If Docker is new to you, start with my Docker basics guide.
- Access to your router's port forwarding settings, only if you want public access.
For the NetBird container, use a Linux Docker host with /dev/net/tun available; a dedicated Ubuntu VM keeps this consistent with Part 2. An LXC needs the appropriate device and capability access too. If NetBird already runs on this host, reuse that peer instead of starting a second client. For private-only access, skip the public-domain, DDNS, and router-forwarding sections entirely.
In the examples, example.com is the public domain, example.net is the local domain, Nginx Proxy Manager runs on 10.0.0.203, and Jellyfin is on 10.0.0.120:8096 to match Part 2. In the video, my Jellyfin was at 10.0.0.205. Swap in your own values.
Create a Scoped Cloudflare API Token
Both the DDNS container and Nginx Proxy Manager use a Cloudflare API token. In the Cloudflare dashboard, go to My Profile > API Tokens > Create Token and use the Edit zone DNS template.
In the video I set Zone Resources to all zones. I'd tighten that now. Cloudflare's token docs let you scope a token to specific zones, and the certbot Cloudflare plugin docs ask for Zone:DNS:Edit only on the zones you need certificates for. A token that can edit DNS can redirect your domain anywhere, so treat it like a password:
- Choose Include > Specific zone and pick only your public and local domains, not every domain on the account.
- Consider two tokens: one for DDNS scoped to the public domain only, and one for Nginx Proxy Manager scoped to both domains.
- Cloudflare shows the secret once. Store it somewhere safe, and don't paste it into screenshots, Git repos, or support threads.
- Use an API token, not the old Global API Key. The Global Key can manage your entire account.
The Docker Compose Stack
The repo's stack contains Nginx Proxy Manager, the favonia/cloudflare-ddns updater, a NetBird client, and a tiny test page. The example below keeps that layout and uses Compose profiles so only the proxy starts by default. DDNS, NetBird, and the test page can each be enabled when needed.
For a fresh installation, create a local project directory and protect .env before entering any credentials:
sudo mkdir -p /docker/proxy
sudo chown "$(id -u):$(id -g)" /docker/proxy
cd /docker/proxy
touch .env
chmod 600 .env
nano .env
Then save this as compose.yaml in the same directory. Existing installations should preserve their project name and volumes rather than starting a second empty instance.
services:
  proxy:
    image: 'jc21/nginx-proxy-manager:2.17.1'
    container_name: nginx-proxy-manager
    restart: unless-stopped
    network_mode: host
    volumes:
      - data:/data
      - letsencrypt:/etc/letsencrypt
    healthcheck:
      test: ["CMD", "/usr/bin/check-health"]
      interval: 10s
      timeout: 3s

  ddns:
    profiles: [public]
    image: favonia/cloudflare-ddns:1
    container_name: cloudflare-ddns
    restart: unless-stopped
    user: "1000:1000"
    read_only: true
    cap_drop: [all]
    security_opt: [no-new-privileges:true]
    environment:
      - CLOUDFLARE_API_TOKEN=${CLOUDFLARE_API_TOKEN:-}
      - DOMAINS=example.com,stream.example.com
      - PROXIED=is(example.com)
      - IP6_PROVIDER=none

  netbird:
    profiles: [remote]
    image: netbirdio/netbird:0.83.1
    container_name: netbird
    hostname: proxy-stack
    restart: unless-stopped
    network_mode: host
    cap_add: [NET_ADMIN, SYS_ADMIN, SYS_RESOURCE]
    devices:
      - /dev/net/tun:/dev/net/tun
    environment:
      - NB_SETUP_KEY=${NB_SETUP_KEY:-}
      - NB_MANAGEMENT_URL=${NB_MANAGEMENT_URL:-https://api.netbird.io:443}
    volumes:
      - netbird-client:/var/lib/netbird

  # Temporary test page, available only through the host or proxy.
  helloworld:
    profiles: [test]
    image: 'karthequian/helloworld:latest'
    container_name: helloworld
    restart: unless-stopped
    ports:
      - 127.0.0.1:8888:80/tcp

volumes:
  data:
  letsencrypt:
  netbird-client:
Put the DDNS token in .env only if you'll use public access. The separate NPM certificate token goes in NPM's certificate form later. Add the NetBird setup key when you reach that section:
CLOUDFLARE_API_TOKEN=REPLACE_WITH_YOUR_SCOPED_TOKEN
# Set this before enabling the remote profile:
NB_SETUP_KEY=
# For a self-hosted NetBird deployment, uncomment and set its public HTTPS URL:
# NB_MANAGEMENT_URL=https://netbird.example.org
Start the proxy and test page after validating the file:
docker compose config --quiet
docker compose --profile test up -d proxy helloworld
docker compose ps
The repo Compose file uses latest tags. NPM and NetBird are pinned here; DDNS uses the upstream-recommended 1 tag, which follows stable 1.x updates. Read the release notes before upgrading: NPM's release still warns that DNS plugins may need dependency changes. If you use Portainer instead, supply credentials as stack environment variables and enable the equivalent optional services; these command-line profile examples assume Docker Compose.
Nginx Proxy Manager: Host or Bridge Networking
I'm a sucker for a good web GUI, and this is one of the easiest containers you'll ever deploy. The one decision that matters is networking. I run it with network_mode: host because that has worked best for me, especially for containers on the same machine, where 127.0.0.1:8888 just works. The catch is that it takes ports 80, 81, and 443 directly on the host, which is another reason to give it its own LXC or VM.
The steps below use host networking on Linux throughout. Bridge networking also works, but requires changing the port mappings and upstream addresses together: localhost would mean the proxy container itself. For the test page, put both containers on a shared Docker network and use helloworld:80 as the upstream instead of 127.0.0.1:8888. See NPM's setup examples if you prefer that layout. I use named volumes for data and letsencrypt; bind mounts work fine too.
The DDNS Container
My ISP changes my public IP every few days, and I don't want the site to go down every time that happens. The updater checks your IP on a schedule (every five minutes by default) and fixes the A records in Cloudflare. It has worked great in my testing. With a static IP, skip it.
The user, read_only, cap_drop, and no-new-privileges lines are the project's recommended hardening. Set user to an unprivileged UID and GID on your host. The upstream README notes that no-new-privileges can fail on some older kernels and Proxmox-style virtualized setups, so if the container won't start in your LXC, remove just that line. I set IP6_PROVIDER=none because I don't use IPv6, which also lets it run in normal bridge mode. DOMAINS lists the hostnames it manages: the root domain and the stream subdomain below.
IP6_PROVIDER=none leaves existing AAAA records alone. For this IPv4-only example, remove stale AAAA records for these names manually so clients don't take an unintended IPv6 path. The PROXIED=is(example.com) expression makes only the root domain proxied when the updater creates a record; unlike the repo's blanket true, it keeps a newly created stream record DNS-only. Adjust the expression along with your domain names.
Set Up the Public Domain in Cloudflare
SSL/TLS Encryption Mode
Under SSL/TLS for the public zone, check the encryption mode. In the video I set it to Full. Flexible gave me trouble with Jellyfin, and with Force SSL turned on it's a classic cause of too many redirects.

I also said in the video that Full (strict) would need extra API setup. That isn't accurate. Per Cloudflare's encryption mode docs, Full (strict) only needs a valid public certificate, like Let's Encrypt, on the origin, which is exactly what Nginx Proxy Manager will serve. Once every proxied hostname has its certificate, Full (strict) is the better choice. Newer zones may default to Automatic SSL/TLS, which picks a mode for you.
DNS Records
Under DNS > Records, create the records the DDNS container will manage:
| Type | Name | IPv4 address | Proxy status |
|---|---|---|---|
| A | @ (root) | Your current public IPv4 | Proxied |
| A | stream | Your current public IPv4 | DNS only |
Use the public address shown by your router or an external IP check. The video used a placeholder to demonstrate an update; using the correct address avoids temporarily pointing your domain at someone else's server. The updater preserves existing proxy statuses, so set the table's proxy options explicitly even when using the fallback expression above.
The stream record is not proxied because Cloudflare's CDN terms restrict serving video and other large files through its ordinary CDN without the appropriate paid services. I use DNS-only for this example. The tradeoff is that a DNS-only record returns your real home IP to anyone who looks it up. For access only from your own devices, use the local hostname through NetBird instead and omit this public streaming record.
If you don't stream media publicly, a wildcard CNAME (* pointing to your root domain) is simpler than separate A records.
Deploy and Check
Enable the optional updater and check its logs:
docker compose --profile public up -d ddns
docker compose logs --tail=50 ddns
The logs should show successful checks or updates, and the records should match your current public address. With a proxied record, public DNS returns Cloudflare's edge addresses, so inspect the origin value in the dashboard rather than expecting a DNS lookup to show your WAN IP.
Port Forwarding
For public access, forward TCP 443 on your router to the machine running Nginx Proxy Manager. Forward TCP 80 too if you want plain HTTP requests redirected to HTTPS. DNS-01 certificate issuance and renewal don't need either port open; these forwards are for visitors. Skip this section for a private-only setup.
- Never forward port 81. That's the admin UI. With host networking it listens on every interface of that host, so keep it LAN-only.
- Every proxy host on the public domain is an internet-facing service. Add only what you need, and keep those apps updated and behind strong passwords.
Router labels vary, so distinguish the external listener from the internal destination:
- External/WAN port:
443for HTTPS, or80for the optional HTTP redirect. - Internal/destination port:
443and80on10.0.0.203for this host-networked stack. If you choose bridge networking and remap ports, forward to those published host ports instead.
If your router has a separate client source-port filter, leave it at Any; browsers use varying source ports. If your ISP uses CGNAT, ordinary IPv4 port forwarding won't make the service reachable from the internet. DDNS doesn't remove that limitation; the private NetBird path below doesn't depend on inbound forwarding. Apply the intended inbound firewall restrictions to IPv6 too if your host has a public IPv6 address.
First Login to Nginx Proxy Manager
Open http://10.0.0.203:81. In the video I logged in with the old default credentials (admin@example.com / changeme) and changed them. That no longer applies: v2.13.0 replaced the default account with a setup screen where you create the first admin user, so use a unique email and a strong password. The advanced configuration docs cover INITIAL_ADMIN_EMAIL/INITIAL_ADMIN_PASSWORD for automated deployments and NPM_ADMIN_PORT for moving the UI off port 81.
Generate a Wildcard Certificate
For private-only access, use example.net and *.example.net in this form, then continue to The Local Top-Level Domain below. The public test host and public Jellyfin sections are optional.
Go to Certificates > Add Certificate > Let's Encrypt via DNS and enter both the root and the wildcard:
example.com*.example.com
Choose Cloudflare as the DNS provider. The credentials box comes prefilled with a placeholder. Replace only the token value:
# Cloudflare API token
dns_cloudflare_api_token=REPLACE_WITH_YOUR_SCOPED_TOKEN
Leave Propagation Seconds empty to use the plugin's default. If the request fails, setting it to 120 sometimes fixes it. When I did this, I also had to agree to Let's Encrypt's terms. Current versions removed that step from the form. Save it, and you should get a certificate covering the root and one level of subdomains, such as stream.example.com; deeper names need their own certificate coverage.

Nginx Proxy Manager stores this token in its database so it can renew the certificate automatically. As of v2.16.0, it also deletes the temporary credentials file after each Certbot run. That makes the data volume and the admin UI more sensitive, which is one more reason to keep port 81 private and back up that volume carefully.
Your First Proxy Host
Test everything with the hello world container before adding anything real. Go to Hosts > Proxy Hosts > Add Proxy Host:
- Domain Names:
example.com - Scheme:
http - Forward Hostname / IP:
127.0.0.1, matching the test container’s IPv4 loopback binding because Nginx Proxy Manager uses host networking - Forward Port:
8888 - Enable Block Common Exploits.
On the SSL tab, choose the wildcard certificate and enable Force SSL. In the video, I turned on the other options as well. HTTP/2 is harmless. Be more careful with HSTS Sub-domains on a root domain, because browsers will then insist on HTTPS for every subdomain until the HSTS max-age expires. Turn it on only after everything under that domain has HTTPS.
Visit your domain and you should see the hello world page. I tested it from my phone with Wi-Fi turned off, and it loaded over Cloudflare's proxy, so my home IP stayed hidden for that hostname.
Keep the test container until you've checked the local hostname too. When finished, stop and remove it before deleting its service block:
docker compose stop helloworld
docker compose rm -f helloworld
Then go to Settings > Default Site and choose 404 Page or No Response (444). That handles unmatched hostnames; it does not protect a configured private proxy host from someone who knows its name.
Jellyfin on the Public Domain
Jellyfin is one of the few things I want reachable from outside the house, and if you followed Part 2, yours is already running. It needs a little extra setup behind a reverse proxy.
First, in Jellyfin go to Dashboard > Networking and add the Nginx Proxy Manager host IP (10.0.0.203) to Known Proxies, then restart Jellyfin. The Jellyfin reverse proxy docs explain why: without it, Jellyfin ignores forwarded headers and every client appears to come from the proxy.

Then add a proxy host:
- Domain Names:
stream.example.com - Scheme:
http. Usehttpsonly if the service itself serves HTTPS locally. - Forward Hostname / IP:
10.0.0.120 - Forward Port:
8096 - Enable Block Common Exploits and Websockets Support.
- On SSL, choose the wildcard certificate and enable Force SSL.
In the video I pasted an Nginx Proxy Manager snippet from Jellyfin's docs into the Advanced tab. That NPM-specific page is gone from the current docs. Nginx Proxy Manager already sends the Host, X-Forwarded-For, X-Real-IP, and X-Forwarded-Proto headers itself, so Known Proxies plus websockets covers the basics. From Jellyfin's plain Nginx example, the one line worth adding in Advanced is this:
proxy_buffering off;
Custom Locations
Instead of giving every app its own subdomain, you can use paths. I wanted a few streaming-type services to share the unproxied stream record, so I tried this with Jellyfin:
- In Jellyfin, go to Dashboard > Networking, set Base URL to
/jellyfin, and restart. - Edit the
stream.example.comproxy host, open Custom Locations, and add/jellyfinpointing to10.0.0.120:8096.
After that, https://stream.example.com/jellyfin works. Read the Base URL caveats before you do this. Jellyfin notes that it breaks HDHomeRun, DLNA, Sonarr, Radarr, and some clients. Apps like the Android TV client also need the path included in the server address.
The Local Top-Level Domain
Basically everything else in my homelab lives here. These hostnames resolve to a private IP. If this NPM instance also serves your public domain, create the Local Only access list described below before saving any private proxy host, and select it on each of those hosts. The DNS answer alone doesn't enforce privacy.
In Cloudflare, open the local domain's zone and add:
| Type | Name | Content | Proxy status |
|---|---|---|---|
| A | @ | 10.0.0.203 (the Nginx Proxy Manager host) | DNS only |
| CNAME | * | example.net | DNS only |
When a device looks up proxmox.example.net, DNS returns 10.0.0.203, the device connects to Nginx Proxy Manager on your LAN, and it routes the request by hostname. From anywhere else, that address points into someone else's private network, so it won't reach you. DNS changes can take a few minutes to propagate.

One common gotcha: some routers and DNS filters have DNS rebinding protection, such as dnsmasq's stop-dns-rebind option. They block public DNS answers that point to private IPs. If your local domain won't resolve at home but works on mobile data with a lookup tool, whitelist the domain in that protection.
Now repeat the certificate step for example.net and *.example.net, using a DNS challenge with Cloudflare and your token, unless you already created it for private-only access. Then add proxy hosts like before. To repeat the hello-world test with hello.example.net pointing to 127.0.0.1:8888, restart the test container with docker compose --profile test up -d helloworld and stop/remove it afterward as above. For Proxmox, use:
- Domain Names:
proxmox.example.net - Scheme:
https, because Proxmox only serves HTTPS on 8006 - Forward Hostname / IP: your Proxmox host IP, for example
10.0.0.32from Part 1 - Forward Port:
8006 - Enable Websockets Support, which the console needs.
- Set Access List to Local Only if this instance accepts public traffic.
- On SSL, choose the
example.netwildcard certificate and enable Force SSL.

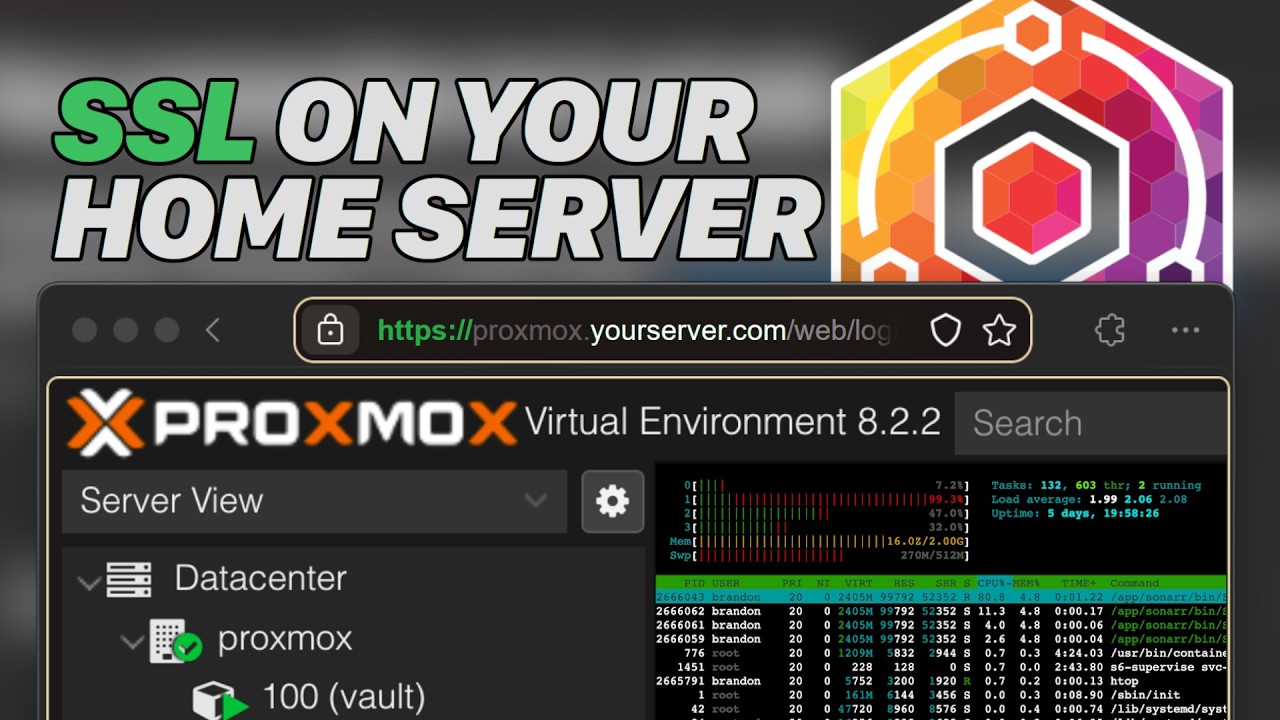
That's the moment from the thumbnail: https://proxmox.example.net with a real Let's Encrypt certificate. No more browser warning, and no more remembering which IP Proxmox is on.
What a local domain with a public certificate exposes
This setup is convenient, but "local" doesn't mean invisible. What is public:
- Certificate names. Let's Encrypt submits every certificate to public Certificate Transparency logs, and anyone can search those logs. Because I use a wildcard, the logs show
example.netand*.example.net, notproxmox.example.net. Per-host certificates would list every service name. - Your internal addressing. Anyone can look up the local domain and see the private IP of your proxy. That's not a way in by itself, but it does reveal part of your internal network.
- The proxy host is shared. This is the big one. If the same Nginx Proxy Manager accepts public traffic, someone who guesses
proxmox.example.netcan point that name at your public IP in their hosts file. Without an access list, NPM would proxy that request to Proxmox. The private DNS answer doesn't block that path.
If you forward public HTTPS to the same Nginx Proxy Manager instance that serves your local domain, protect every local-only proxy host with an Access List named Local Only. Go to Access Lists > Add Access List. On the rules tab, Allow your LAN subnet (for example 10.0.0.0/24); add only the authorized NetBird client addresses as described below. Nginx Proxy Manager adds a final deny-all rule automatically. Then select that list on each local proxy host. Alternatively, run a second proxy instance for local services that isn't port forwarded.
Keep the apps behind those hostnames protected by their own logins too. A valid certificate means the connection is encrypted. It doesn't make the service safe to expose.
Private Remote Access with NetBird
This follows the NetBird client already included in my proxy repo. It joins an existing NetBird account; it isn't a NetBird management server. Use the hosted service at app.netbird.io, or set up your own management deployment with my self-hosted NetBird guide. The employment disclosure above applies here too.
The path will be: your remote device → NetBird → the proxy-stack peer → NPM at 10.0.0.203:443 → the selected application's backend. Keep the existing DNS records pointing example.net and its subdomains to 10.0.0.203; NetBird supplies the route and access controls for that private destination. No new router port forward is needed.
Enroll the Proxy Peer
- In NetBird, create a peer group called Proxy Routing for this server and a Personal Devices group for the laptop or phone that should connect remotely.
- Under Settings > Setup Keys, create a short-lived, one-off key and auto-assign Proxy Routing. NetBird's setup-key guide explains the options. Keep this server non-ephemeral so its identity persists.
- Put the key in
NB_SETUP_KEYin the protected.envfile. For self-hosting, also setNB_MANAGEMENT_URLto your management service's public HTTPS address. Leave that variable unset for NetBird Cloud. - Start the optional client and check its status:
docker compose --profile remote up -d netbird
docker compose exec netbird netbird status -d
Wait until the management and signal connections are established and proxy-stack appears in the dashboard. The Compose example follows NetBird's Docker installation guide, including host networking, capabilities, and the persistent netbird-client volume. Preserve that volume across updates. The setup key enrolls the peer; it isn't the peer's long-term identity.
Add the Proxy Resource and Policies
In Networks, create a Home Network, assign proxy-stack as its routing peer, and add 10.0.0.203/32 as a resource in a Local Proxy resource group. Grant Personal Devices access to Local Proxy on TCP 443. Use the single proxy address rather than granting the whole LAN; NPM makes the backend connections. The Networks guide covers the resource and policy setup.
There's one extra step for this exact Compose layout: NPM and NetBird run on the same Linux host. Keep the /32 resource so remote devices receive the LAN route, and add a separate peer-to-peer policy from Personal Devices to Proxy Routing, allowing TCP 443. A network resource policy controls forwarded traffic; services on the routing peer itself use the input policy instead. See reaching the routing peer itself. The native Linux backend doesn't need NB_ENABLE_LOCAL_FORWARDING; a userspace/netstack deployment does.
Review other policies too. NetBird's default policy permits all peers to communicate, and allow policies are additive. Replace that broad policy with the narrower rules your network needs before treating TCP 443 as the only permitted port. Don't grant port 81 merely to reach the proxied apps.
This permits access to NPM's HTTPS listener, which can serve several hostnames. It doesn't separate applications by hostname; keep their own logins and appropriate per-host access controls.
Allow the NetBird Path Through NPM
If you applied the Local Only access list, add the authorized clients' NetBird IPs as /32 entries. In this same-host layout, NPM normally sees the remote peer's overlay address. Confirm the source address in NPM's access logs before finalizing the list, and keep the deny-all fallback. If you later move the routing peer to a different LAN machine with masquerade enabled, NPM sees that machine's LAN IP instead. The routing-peer guide explains that source-address change.
If you use host or Proxmox firewalls, allow the same intended TCP 443 path there too. A separate private NPM instance with no WAN forwarding remains the simpler boundary when you want to separate public and private applications completely.
Connect a Remote Device and Test
Install the NetBird client on your laptop or phone, sign in to the same deployment, and put the peer in Personal Devices. Then test from mobile data or another network:
nslookup proxmox.example.net
curl -I https://proxmox.example.net
The name should resolve to 10.0.0.203, and HTTPS should use the valid certificate without disabling verification. Open the page and test the Proxmox console as well. If DNS fails but a direct connection works, check the resolver and DNS-rebinding protection. My split DNS guide covers distributing home DNS through NetBird; that also needs access to the resolver, not just a nameserver setting.
Test the boundary too: off-LAN with NetBird disconnected, the private service must be unreachable. If you also forward public HTTPS to this NPM instance, test its public address with the private hostname. Replace the documentation address below with your actual WAN IP:
curl --resolve proxmox.example.net:443:203.0.113.10 https://proxmox.example.net/
That request must be denied or unreachable, rather than returning the Proxmox login page. It checks the access control even when DNS is bypassed. Also test from a NetBird peer outside Personal Devices to verify that a connected peer doesn't automatically gain access. With NetBird disconnected at home, the direct LAN path should still work.
How My Setup Ended Up
A day after recording, I had moved basically everything over and ended up with 19 proxy hosts. That includes a docker. hostname for the Portainer instance on the proxy machine, plus the Portainer instances on my other Docker VMs and LXCs, Home Assistant, Jellyfin, the *arr apps from Part 3, NZBGet, and my torrent client. Most of them needed nothing special, but a few did:
- Home Assistant rejects proxied requests until you trust the proxy. In the video I edited the
http:block inconfiguration.yaml. Since Home Assistant 2026.8, that moved to the UI. Go to Settings > System > Network > HTTP server, enable Trust X-Forwarded-For, and add your proxy IP under Trusted proxies. If you still have an oldhttp:YAML block, Home Assistant imports it and asks you to remove it (HTTP integration docs). - My torrent client needed a few extra lines in the proxy host's Advanced tab. I found them while troubleshooting:
proxy_read_timeout 120;
proxy_redirect off;
client_max_body_size 100M;
- The *arr apps were the one place where I failed. I wanted them under paths on one hostname instead of separate hosts, using custom locations, but couldn't get it working. They each got their own subdomain. If you've cracked that, I'd love to hear how.
The other open item is the streaming subdomain. It's DNS-only, so it shows my home IP. I'm still looking for a good way to hide that IP for media and file streaming without breaking Cloudflare's terms.

Back Up Before Upgrading
Keep compose.yaml, the protected .env, and all three named volumes: data holds NPM's database and proxy configuration, letsencrypt holds certificates and renewal state, and netbird-client holds the enrolled peer's identity. These backups contain secrets, so restrict access and keep a protected copy off the Docker host. If NetBird isn't enabled, its volume may not exist yet.
For a consistent file-level backup, stop the stack during a maintenance window before copying the volumes, especially NPM's SQLite database. Record which optional services were running and restart those services afterward. A VM backup is another option; my Proxmox Backup Server guide covers that workflow. Test a restore before depending on either method.
Before an upgrade, read the release notes, back up, and pull the selected images. Preserve the Compose project name and volume names when recreating containers. Don't use docker compose down -v as an update step: it deletes the state you need. Afterward, check proxy health, certificate renewal, and remote access again.
Wrapping Up the Series
That's the whole build. Part 1 set up Proxmox, ZFS, and shared storage. Part 2 added Jellyfin. Part 3 automated the library. This part gave all of it real names and real certificates. The local domain in particular turned out to be pretty easy to set up, and not clicking through certificate warnings or remembering IP addresses anymore is worth the effort.
With all of this configured, from VMs to containers to the proxy's data volume, make sure it's backed up. Rebuilding 19 proxy hosts from memory is nobody's idea of fun. My Proxmox Backup Server guide covers that. If you're starting fresh, head back to Part 1. With all that, I do hope you have an absolutely beautiful day.